Posts in science
Weather-Related Hazards - Activities for 3rd Grade Science

I’ve been planning to write this post for a while, but I never thought it would be THIS relevant! Where I live on the West Coast, we have had a ton of rain this season and it’s caused floods in several local areas. So writing about the topic of weather-related hazards is quite relevant for students in my area. How do we teach about weather-related hazards to our students? There are several engaging ways for students to learn about weather-related hazards in third grade.

What are weather-related hazards?

Extreme weather is anything like extreme precipitation, high winds, hurricanes, extreme heat or cold, thunderstorms and lightning. These weather events can cause hazards like flooding, injury, damage to buildings and crops, and even death. There are ways to help prevent these hazards in the community, such as building seawalls, living in wind resistant shelters and having hurricane shelters. There are several ways to engage students in activities to help them learn about extreme weather and weather-related hazards.

Reading about types of extreme weather and natural disasters

Reading passages about weather related hazards.

At the beginning of an extreme weather unit, I like to have my students read about different types of extreme weather. They also read about the weather-related hazards associated with each form of weather. For example, when reading about hurricanes, students will also read about the importance of staying indoors and staying away from doors and windows. 

Before students can begin designing and researching, they first need to understand the different forms of extreme weather. Reading informational text is my favorite way to help build this background knowledge.

Design a weather resistant shelter

Have students build a Wind Resistant Shelter! Grab the plans here.

After students have had a chance to read about extreme weather and weather-related hazards, it’s time to get hands-on! Challenge your students to make a wind resistant shelter. Prepare materials, like tape, glue, popsicle sticks, paper, cardboard, etc, for each student or small group of students. Take time to talk about what you know about stable shelters. Then make a T-chart of characteristics of stable and unstable shelters. 

After students have brainstorms the characteristics of stable and unstable shelters, they get to design their own wind resistant shelter. I like to use a hair dryer as my source of wind! Students really get a kick out of seeing their shelter “attacked” by the hair dryer.

Extreme Weather Research Project

Research solutions to local weather related hazards. Have students identify the answer to questions like:

  • What weather do you see?

  • What ways do people locally reduce impacts? 

  • How do people prepare?

  • How are houses built?

  • How are people warned about extreme weather?

Students love learning about their own neighborhoods, but also let them research other areas of the world as well. For example, do communities in Kansas prepare for high winds differently than communities in Asia? These are interesting research questions for students to look into.

build a bridge

In many areas of the world, heavy rains can affect rivers, which in turn can affect bridges. Similar to the weather resistant shelter, challenge your students to build weather resistant bridges. Have students experiment with materials like sugar cubes, lego pieces, paper, popsicle sticks, etc. Students should build their bridge in a tupperware container. Then pour water into the container to see how the bridge reacts to water. You could even move the tupperware container from side to side to simulate waves.

Different materials will react differently in water. This challenge is open-ended and allows students to use their critical thinking skills.

Extreme Weather Safety Kit

Another great way to learn about weather-related hazards is to learn about how to prepare for them. Each region is prone to different types of extreme weather, but it seems like safety kits are pretty standard no matter which extreme weather we face. Talk to students about items that should be in a safety kit and have students put together a sample.

I’m not talking about a physical sample (unless you have the resources and budget to do this). I’m meaning a paper collage. Have students cut out pictures of things like canned food, water bottles, flashlights, bandaids, etc. Then have students glue these onto their “safety kit”. They can take this home to show their parents. 


If you’re looking for lessons that are completely prepared for you, check out my Reading into Science: Weather Related Hazards unit. This unit is designed to teach third grade students all about 7 different kinds of extreme weather and weather related hazards. What is extreme weather? How can we protect ourselves and our homes from extreme weather? What hazards should we be aware of?

The lesson plans are completed for you so you don’t have to worry about anything.

Plan Your Extreme Weather Lessons with a Click!

Looking for a FAST way to plan out your hazardous weather unit that already includes paired nonfiction passages? In just a few clicks you can grab all of the pieces you need: lesson plans, paired passages, reading comprehension, key reading skills, and a hands-on STEM challenge. Click and print. Planning is really that easy.

Extreme weather, weather-related hazards and weather safety as such important topics to explore with our students. If you have any favorite activities that you use to teach about weather-related hazards in third grade, feel free to let me know!

Pin Me for Later!

4 Lessons About Fossils for 3rd Grade

Do you remember when you were a kid and you would dig for buried treasure? Or did you search for dinosaur bones? And when you learned about fossils, did you search high and low for fossils in the forest, at the beach and in your backyard? Well, I think it’s safe to say that kids are obsessed with finding things like fossils. I’ve always tried to channel that energy and excitement into science lessons on fossils, because it’s such a great one to channel. Take a peek at some of my favorite lessons about fossils for 3rd grade.

How Do You Explain Fossils to Kids?

Fossils teach us a lot. They are the preserved remains of plants or animals that turn into stone over a long period of time. Our students need to understand that fossils are created through a process called fossilization. Then, we need to teach students about the different types of fossils. There are petrified fossils, preserved fossils, molds, casts, and trace fossils. There are even mummified fossils. Each fossil is created in a different way. Your students will be so excited to learn about fossils.

Make Your Own Fossils

A sure fire way to engage your students is making your own fossils. Make some air dry play dough or buy some clay, like Crayola Model Magic. Then have children press an object like a toy animal, a leaf, a pencil...really anything….into the clay. Remove the object and then let the clay dry. You’ve just made a trace or cast fossil. 

If you want to get extra creative, you can buy some plaster from Amazon or Michaels and pour the plaster into the clay mold. Let it dry and have students “excavate” the mold like a paleontologist.

Dry Noodle Dinosaurs

If you want another hands-on activity, you might love dry noodle dinosaurs. Print out pictures of common dinosaurs from Google Images. Then, using construction paper, white glue and dry pasta noodles, students can recreate what the dinosaur bones would have looked like. For example, they might use long spaghetti noodles for the neck bones of the brachiosaurus. Then they might use shorter spiral noodles for the legs and macaroni for the ribs. This is a chance for students to be creative as they create their own dinosaur fossils.


Fossils For Kids Video

This YouTube video is a great mini lesson about how fossils are formed, the types of fossils and more! 

Combine fossils with close reading!

Nonfiction reading passages all about fossils.

There is so much to learn about fossils, and one of my favorite ways to teach about fossils is to combine the science of fossils with close reading passages. When we dive into informational text it really gives students the background knowledge (and vocabulary!) to be able to interact with the hands-on materials in a new way.

In this unit, we started by looking at two paired passages: What is a Fossil and Digging Up Dinosaurs. We read both, answered comprehension questions, and focused in on ‘sequencing’ as our key reading skill.

Then, for the STEM extension, students made their own fossils using a simple air dry coffee/salt dough. They planned out items to ‘fossilize’ and sketched their completed fossils. It was a lot of fun.

If you’re looking for lessons that are completely prepared for you, check out my Reading into Science: Fossils unit. This unit is designed to teach third grade students all about fossils. What are fossils? What can they teach us? How are they extracted from the earth? 

The lesson plans are completed for you so you don’t have to worry about anything.

Fossils are fascinating for children! Let’s help our students get fully engaged as they learn from the fascinating world of fossils.

Plan Your Fossils Lessons With One Click

Looking for a FAST way to plan out your fossils unit that already includes paired nonfiction passages? In just a few clicks you can grab all of the pieces you need: lesson plans, paired passages, reading comprehension, key reading skills, and a hands-on science extension. Click and print. Planning is really that easy.

Want to try an integrated reading and science lesson for free? ‘Bridges’ is an integrated reading and science lesson that covers NGSS standards all about the Engineering and Design process. It includes paired passages about famous bridges, reading comprehension, and a science extension. Sign up and try it out for free today.

3rd Grade Science - Weather and Climate Activities

“It’s raining cats and dogs,” “Mr. Sun, Mr. Sun”, “Down came the rain and washed the spider out…”, “Cloudy with a chance of meatballs.” The phrases about weather are endless. Kids know songs about the weather. There are stories about the weather. There are popular phrases about the weather. Weather is all around us. And it’s part of the curriculum! Take a look at some of the MOST fun (and educational!) third grade weather and climate activities. 

What is the difference between weather and climate?

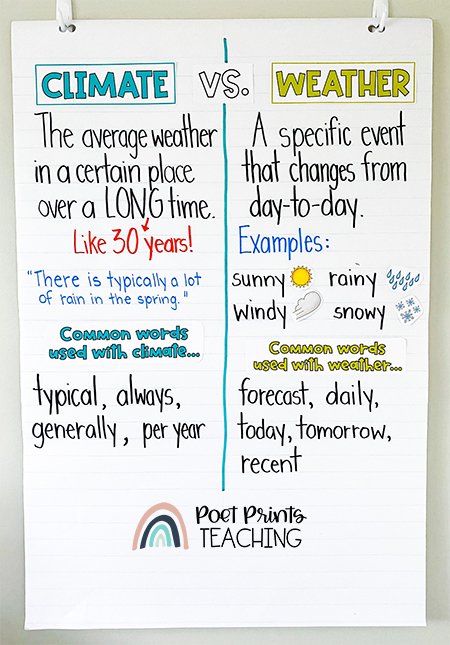
Weather vs. Climate anchor chart.

Weather is a specific event, like a thunderstorm, rain or snow. Weather might last a short time, like a short rainfall, or it might last longer like a snowstorm that lasts for six days. Climate is the average of all the weather that happens in a place over the past 30 or more years. Climate describes what the weather is normally like in a region. So now that we know the difference between climate and weather, let’s look at some fun 3rd grade weather and climate activities.

We use an anchor chart like the one pictured to help kids really visualize the differences between weather and climate.


track the weather near and far

Tracking daily weather is a great (and quick!) activity to draw attention to daily weather patterns. This activity doesn’t need to take more than 5-10 minutes, and can be used for math tie-ins later down the road. Once you’ve gathered data on weather and temperature patterns for a number of weeks it’s a great chance to tie in some graphing and data outcomes!

Tracking the weather in two distinct locations is a fun and simple way to gather data and make great scientific observations about weather patterns!

We use a simple notebook journal to record the weather, temperature, and precipitation of our city.

To take this activity to the next level, use the same notebook to compare weather with a far away location. Weather apps are great for this! Have students make notes on the differences that they are seeing. We live in the west coast of Canada, and chose to follow a the weather in a city in Australia. It was so interesting to watch students research the warm daily weather in Australia during our rainy and cold season.

What is the average temperature in our location compared to the far away destination? Do we think their climate is similar to ours or different? , students can even compare and contrast the weather from a far away location to the weather at their school.

Shaving Cream Rain Clouds

Did you know that you can make it rain in a jar and you only need a few materials? Get a glass jar, shaving cream and food coloring. Fill the glass jar with water and put shaving cream on the top. The shaving cream represents the cloud. Then start dripping food coloring on top of the shaving cream. Explain to your students that when the cloud is heavy enough, it will start to rain. Sure enough, when you have put enough food coloring drops on the cloud, it will start to rain.

Pro Tip: Dilute the food coloring with water, otherwise you’ll go through a lot of food coloring drops.

Combine close reading and a travel brochure project

One of my favorite ways to teach about weather and climate is to combine the weather and climate with paired close reading passages. When we dive into informational text it really gives students the background knowledge (and vocabulary!) to be able to interact with the hands-on materials in a new way. 

In this unit, we looked at informational texts about Weather and Climate and then dug into a set of paired passages about the weather and climate in two very different locations in the world: Rio de Janeiro and Moscow!

Then, students were asked to imagine that they have been hired by “Terrific Travels”, a fictitious travel agency. In a project-based learning activity, they were tasked with designing a travel brochure for a terrific destination, and needed to include information about the climate and weather! It was a great way to have students show their understanding of climate and weather in a way that wasn’t just worksheets. (Plus, it was so easy to prepare!)
Plan Your Weather and Climate Lessons With One Click

Looking for a FAST way to plan out your weather and climate unit that already includes paired nonfiction passages and this project based learning travel brochure? In just a few clicks you can grab all of the pieces you need: lesson plans, paired passages, reading comprehension, key reading skills, and a hands-on science extension. Click and print. Planning is really that easy.


Zip Bag Water Cycle

We learn all about the water cycle in 2nd grade up here in BC, but it fits in so nicely when teaching about weather and climate as well! With just a few household ingredients you can help to quickly explain the water cycle to your students.

Here’s what you’ll need:

  • A plastic zippered bag

  • Food coloring

  • Tape

First, pour some water into the bag. It should be enough to cover the bottom of the bag by ½ inch to an inch. Add a few drops of food coloring so students can see the water better. Blue is preferable to best represent water, but any color works! Close the bag and tape it to a window or a wall facing a window.

As the water warms, it will start to evaporate. But the water vapor won’t be able to escape the bag because the bag is sealed. The water vapor gets trapped at the top of the back and eventually starts to cool. As it cools, it condenses like a cloud. When it condenses enough, it falls down like rain. While this isn’t a perfect illustration, it gives the students a great sense of the water cycle and how clouds and rain form. 

Bill Nye Explains Climates

Were you a huge fan of Bill Nye the Science Guy when you were a kid? I sure was! I loved watching Bill Nye do experiments and explain science in fun ways. Well, I stumbled across this episode of Bill Nye all about Climates! Check it out:

Climate and weather are literally all around us. Let’s commit to teaching them with excellence so our students have a solid understanding of climate and weather.


Want to try an integrated reading and science lesson for free? ‘Building Bridges’ is an integrated reading and science lesson that covers NGSS standards all about the Engineering and Design process. It includes paired passages about famous bridges, reading comprehension, and a STEM extension. Sign up and try it out for free today.

4 Easy STEM Challenges for Third Grade

Are you trying to integrate more STEM challenges into your classroom? Are you struggling to find ideas that are quick to set up and don’t necessarily require you to spend a ton out of pocket? Hands-on science is the backbone of my third grade classroom - we absolutely LOVE any activity or lesson that lets us build with our hands and think outside of the box. I have four easy STEM challenges for third grade. These ones are quick, easy, and won’t cost an arm and a leg! 

Text: 4 Easy STEM Challenges for Third Grade
Image: Text is displayed over colorful beakers.

What Makes a Good Stem Challenge?

Before we dive into the challenges, let’s talk about what makes a good STEM challenge! For me it comes down to a few core things. It has to be engaging. Hands-on challenges are a great way to increase engagement. Another key area is doing a STEM challenge that is student-centered. Students want to be doing the challenge, not watching their teacher do it. And a good STEM challenge should be open-ended so students have freedom to explore and discover while creating.

paper chain challenge

One of the EASIEST stem challenges for third grade is one that uses almost NO supplies at all… the paper chain challenge! For this challenge, all you need to give your students is tape and a single piece of paper. It’s that easy (and that cheap!) Then, challenge them to see how long of a paper chain they can make using only one piece of paper and tape. (Want to extend the challenge: limit your student to 12 inches of tape!) My students have loved this challenge and I’m confident your students will too!

Build a Bridge

Let’s look at some examples. In this free Reading into Science unit, students read about famous bridges and then they get to build bridges in an engaging STEM challenge. Using materials like large popsicle sticks, clothespins, classroom books and tape, students will design and create a bridge. You can even challenge students to design a bridge that will hold up something heavy, like textbooks. This engaging resource for third grade combines paired informational text, reading skills and a STEM challenge in a way that is sure to leave your students ready for the next one! You can grab it for FREE below.

create the tallest tower

A small tower is built with toothpicks and gummy candy.

This tower has been created with toothpicks and gummy candy!

If your students love building the bridges, they will inevitably love trying to build the tallest tower in the class. In this integrated science and reading unit, students will read about real-world skyscrapers. Then they will engage in a STEM activity to build the tallest tower using whatever materials you have in class. This STEM activity is left purposely open-ended so that you and students can choose materials that you already have on hand. Students could build towers using things like index cards and tape, toothpicks and gummy candy, spaghetti and mini marshmallows, playdough and bamboo skewers. The list could go on and on. Students will love creating and competing with each other to build the tallest tower.

droplets on a penny

This STEM challenge requires a penny (or a nickel… any coin with a defined lip around the edge), water, and an eyedropper/pipette. Begin this challenge by asking students to make a hypothesis: “How many drops of water do you think will fit on top of the penny?” Record their answers. Then, begin the challenge. I can almost guarantee that they will be very surprised by the answer. “The Sci Guys” on YouTube break down this experiment in greater detail. The scientific explanation starts at the 2:20 mark.

Well, there you have it, four engaging and easy STEM challenges for third grade. And they’ll hardly cost you a thing! w Do you have any favorite STEM Challenges? If so, I’d love to hear about them! 

Pin Me For Later!

How to Integrate Science and Reading

I don’t know about you, but my classroom always seems to be short on time. Traditional classroom schedules have always taught each subject separately: math, reading, writing, science… all done in their own blocks. But we know that integrated learning is such an effective way to teach learning targets at once. Integrated learning blends subjects together, teaching more than one at the same time… and I am a HUGE fan of integrating science and reading, especially in 3rd grade.

reading-and-science-integration-header.jpg

Why is reading important in science?

So much of science involves carefully examining informational text. Scientists do extensive research on a topic in order to determine if the topic is worth further investigation. They pour through books to glean information and make predictions, to further their understanding of a topic, to form hypotheses and research proposals. They read other scientists’ research to learn more.

Reading truly is an essential part of science. It’s an important skill for research. And it’s our job to help students learn how to do this accurately. We can teach them how to gather information. What kinds of information to look for. How to understand the information.

Teach Students to Examine Informational Text

First, we need to teach students how to look at informational texts. There are so many genres out there. We need to teach students how to navigate these. Students need to read informational texts differently than fantasy texts. They need to read fiction texts differently than nonfiction texts.

So, first and foremost, we should tell our students how to identify these texts.

From there, give students some informational text and help your students to take a closer look at it. What do they notice about the pictures? What do they notice about the vocabulary?  Read the text through together and have students make connections to things they might have experienced in their lives. For example, if you are reading about fossils, have students discuss what they know about fossils before reading. Then afterwards, have them reflect on if the information they shared is accurate or not.

Reading informational text often includes looking at the text features: headings, subheadings, bolded words, pictures, diagrams and more. The text features in a piece of informational text can give us important information as well! When we are looking at informational text I try to stop and point out what I’m seeing in each text feature.

The title of this page is ‘Digging Up Dinosaurs’ I wonder what that tells us about what we are going to read.” “What can we see in this picture? What new information can it tell us?”

Modelling our thinking, out loud, is an important part of teaching students to read informational text.

Apply Reading Skills to Science

While reading informational science texts, make sure to apply reading skills. There are several things you could do. Throw in some comprehension questions. Have students underline new vocabulary words and find the definitions. Have students sequence events from the informational text. Distinguish facts from opinions in a text. Compare and contrast similar information.

I can’t wait to share more about how I integrate reading and science in third grade. It’s saved me so much time, and I know it can make an impact in your classroom.

If you’re ready to give it a try now, take a peek at Reading into Science, my brand new resource line that integrates close reading with engaging STEM extensions! You can check out the first lesson for FREE.

Pin Me for Later!

Text: How to teach Reading and Science together!Image: Text is displayed over images of stacked books and science materials.

Text: How to teach Reading and Science together!

Image: Text is displayed over images of stacked books and science materials.

Grade 3 Science Lessons - Especially For Teachers in BC

I’ve spent most of my teaching career in grade three. I have a soft spot for grade three students. There’s something about the way that they are not-quite preteens, but no longer little kids that is the perfect sweet spot for learning. Teaching grade 3 science lessons are a lot of fun, we explore atoms and molecules, look at landforms around us, get outside with biodiversity, and even grow our own plants to see life cycles in person!

Text: Science Lesson for Grade Three Image: A student examines a beaker with a magnifying glass.

Text: Science Lesson for Grade Three
Image: A student examines a beaker with a magnifying glass.

Not teaching in BC? You might be looking for NGSS (Next Generation Science Standards) aligned lessons and ideas for 3rd grade. That’s over in this post: 3rd Grade Science Topics

how do you teach science in grade 3?

When it comes to teaching science lessons in grade 3, I’ve always taken the hands-on approach. I love how invested third graders are in project-based learning, and how willing they are to try an inquiry-based investigation. Grade 3 science is perfect for lessons like these! 

But don’t be mistaken, I don’t hand students a project-based learning activity and walk away. There is so much scaffolding that goes into hands-on projects. I start every single science unit with teacher-led learning to give students at least a little background information on our new topic.  We learn new vocabulary, read informational texts to build a knowledge base, and then set off on student-led learning. I find that this approach makes our project-based and inquiry-based learning way more successful.

what are the topics in grade 3 science?

In BC, our science curriculum is mainly guided by the BC big ideas.  The BC Big ideas for Grade 3 science are:

  • Living things are diverse, can be grouped, and interact in their ecosystems

  • All matter is made of particles

  • Thermal energy can be produced and transferred

  • Wind, water, and ice change the shape of the land

When teaching these as topics, I teach these ideas in 5 distinct topics:  Landforms, Matter, Thermal Energy, Biodiversity, Plants. To read an in-depth post on each topic be sure to click through!

Teaching Local Landforms

Science-lessons-landforms-header.jpg

I’ve always been a big believer that science lessons can (and should!) be made as relevant to your students as possible. When we study landforms I try my best to connect each landform to ones in our local community or ones that may be familiar to my students. Mountains? I’ll choose the one we can see from our classroom. River? The local summer swimming spot. Lake? The one we visit during our last field trip of the year. The more I can connect our landforms unit to our local community the better. This post has my absolute favorite landforms projects and activities.


States of Matter Activities

states-of-matter-science-lessons-header.jpg

The three states of matter is a topic that our curriculum (here in BC) circles back to again and again… and with the right activities and lessons, it’s just so much fun! In Grade 3, we look at how all matter is made up of atoms, and what the atoms look like in a solid, liquid, and gas. We’ll build the particles out of classroom materials, act it out with our bodies, and get hands-on with experiments that show all three states. This post lays out how I introduce what matter is (and isn’t!) and some simple activities to get you started.


How is Thermal Energy Transferred? Science for Kids

thermal-energy-science-lessons-header.jpg

We learn about Thermal Energy after Matter so that students already have a good understanding of atoms and how particles move. I have always chosen to study thermal energy in the winter so that we can use hot cocoa to see conduction in action (as our hands warm-up) and try out various materials as insulators against the cold. There are so many fun thermal energy activities to try in your classroom!


Biodiversity Science Lessons

biodiversity-science-lessons-header.jpg

In our biodiversity unit students discover that biodiversity is literally ALL around us. This is a great unit for getting outside of the classroom. Kids love this unit because it looks so closely at plants and animals… and anything to do with animals is always a hit in grade 3. After we look at just how diverse our own local ecosystems are, I send students off to explore local biodiversity and choose a single plant or animal to research in greater detail.


Inquiry Based Science: How do Plants Grow?

I have found my plants unit to be the most successful as the final unit of the year. By this point in the year, students are capable of planting and tending to a small bean plant completely independently. They can also observe and document plant growth with little assistance from a teacher. I’ve usually conducted this unit as inquiry-based learning, and it’s always such a hit. These inquiry-based plant experiments are such great science lessons for grade 3.

Grade-3-Science-Lessons (5).jpg
Teaching Local Landforms

Teaching all about landforms is a big part of our grade three science curriculum here in British Columbia.  It’s one of my favorite units because it’s a topic that lends itself well to outdoor and interactive learning.  I try to ensure that teaching landforms is as hands-on as possible: we head outside to explore our own local landforms and we make as many student-led projects as possible!  A few things happen in my classroom to make a landforms science unit successful at the second and third-grade level… take a peek!

Text: Science Lessons About Landforms for 3rd and 4th Grades  Image: Text is displayed over an ocean landscape.

Text: Science Lessons About Landforms for 3rd and 4th Grades Image: Text is displayed over an ocean landscape.


Keep It Local

A ‘local landforms’ anchor chart.

A ‘local landforms’ anchor chart.

Teaching about landforms doesn’t have to be theoretical… there are landforms all around us! I’ve found that teaching about our own LOCAL landforms is the best way to hook students in and keep them invested in the unit as a whole.  (We did this in our biodiversity, water cycle, and plants units as well).  We try to make as many connections as possible to places and locations that are familiar to them. Even better if we can visit some of these places during our unit!


Pre-Teach Vocab

I know… I know… I’m starting to sound repetitive on this one,  but my ‘secret sauce’ to successful science is to pre-teach new vocabulary before we really dive in to a new unit.  That means starting with a few lessons on landform vocabulary.  I’ll set up vocabulary words around the classroom and we will do a ‘vocabulary hunt’ where students can search for definitions.  We might also set up a vocabulary ‘memory game’ where the vocabulary words and definitions are placed face down on the carpet and are flipped face up one at a time, just like the traditional ‘memory’ card game. These activities help new words to become familiar enough before we really dig into our science lessons. 

Get Outside and Get Observing

You will be able to find at least one landform example on your school grounds… so find it, sketch it, and label it!  Our school was ON an island, with a view of a mountain… two landforms in one! 

Nothing to observe? The outdoors is the perfect place to create a sketch of what a landform might look like on blank paper.  Sketch an island!  Draw a picture of a the place where a river meets a lake (this is called a delta).  If possible, I like to teach most of this unit from outside of the classroom.  

Explore Local Landforms In Depth

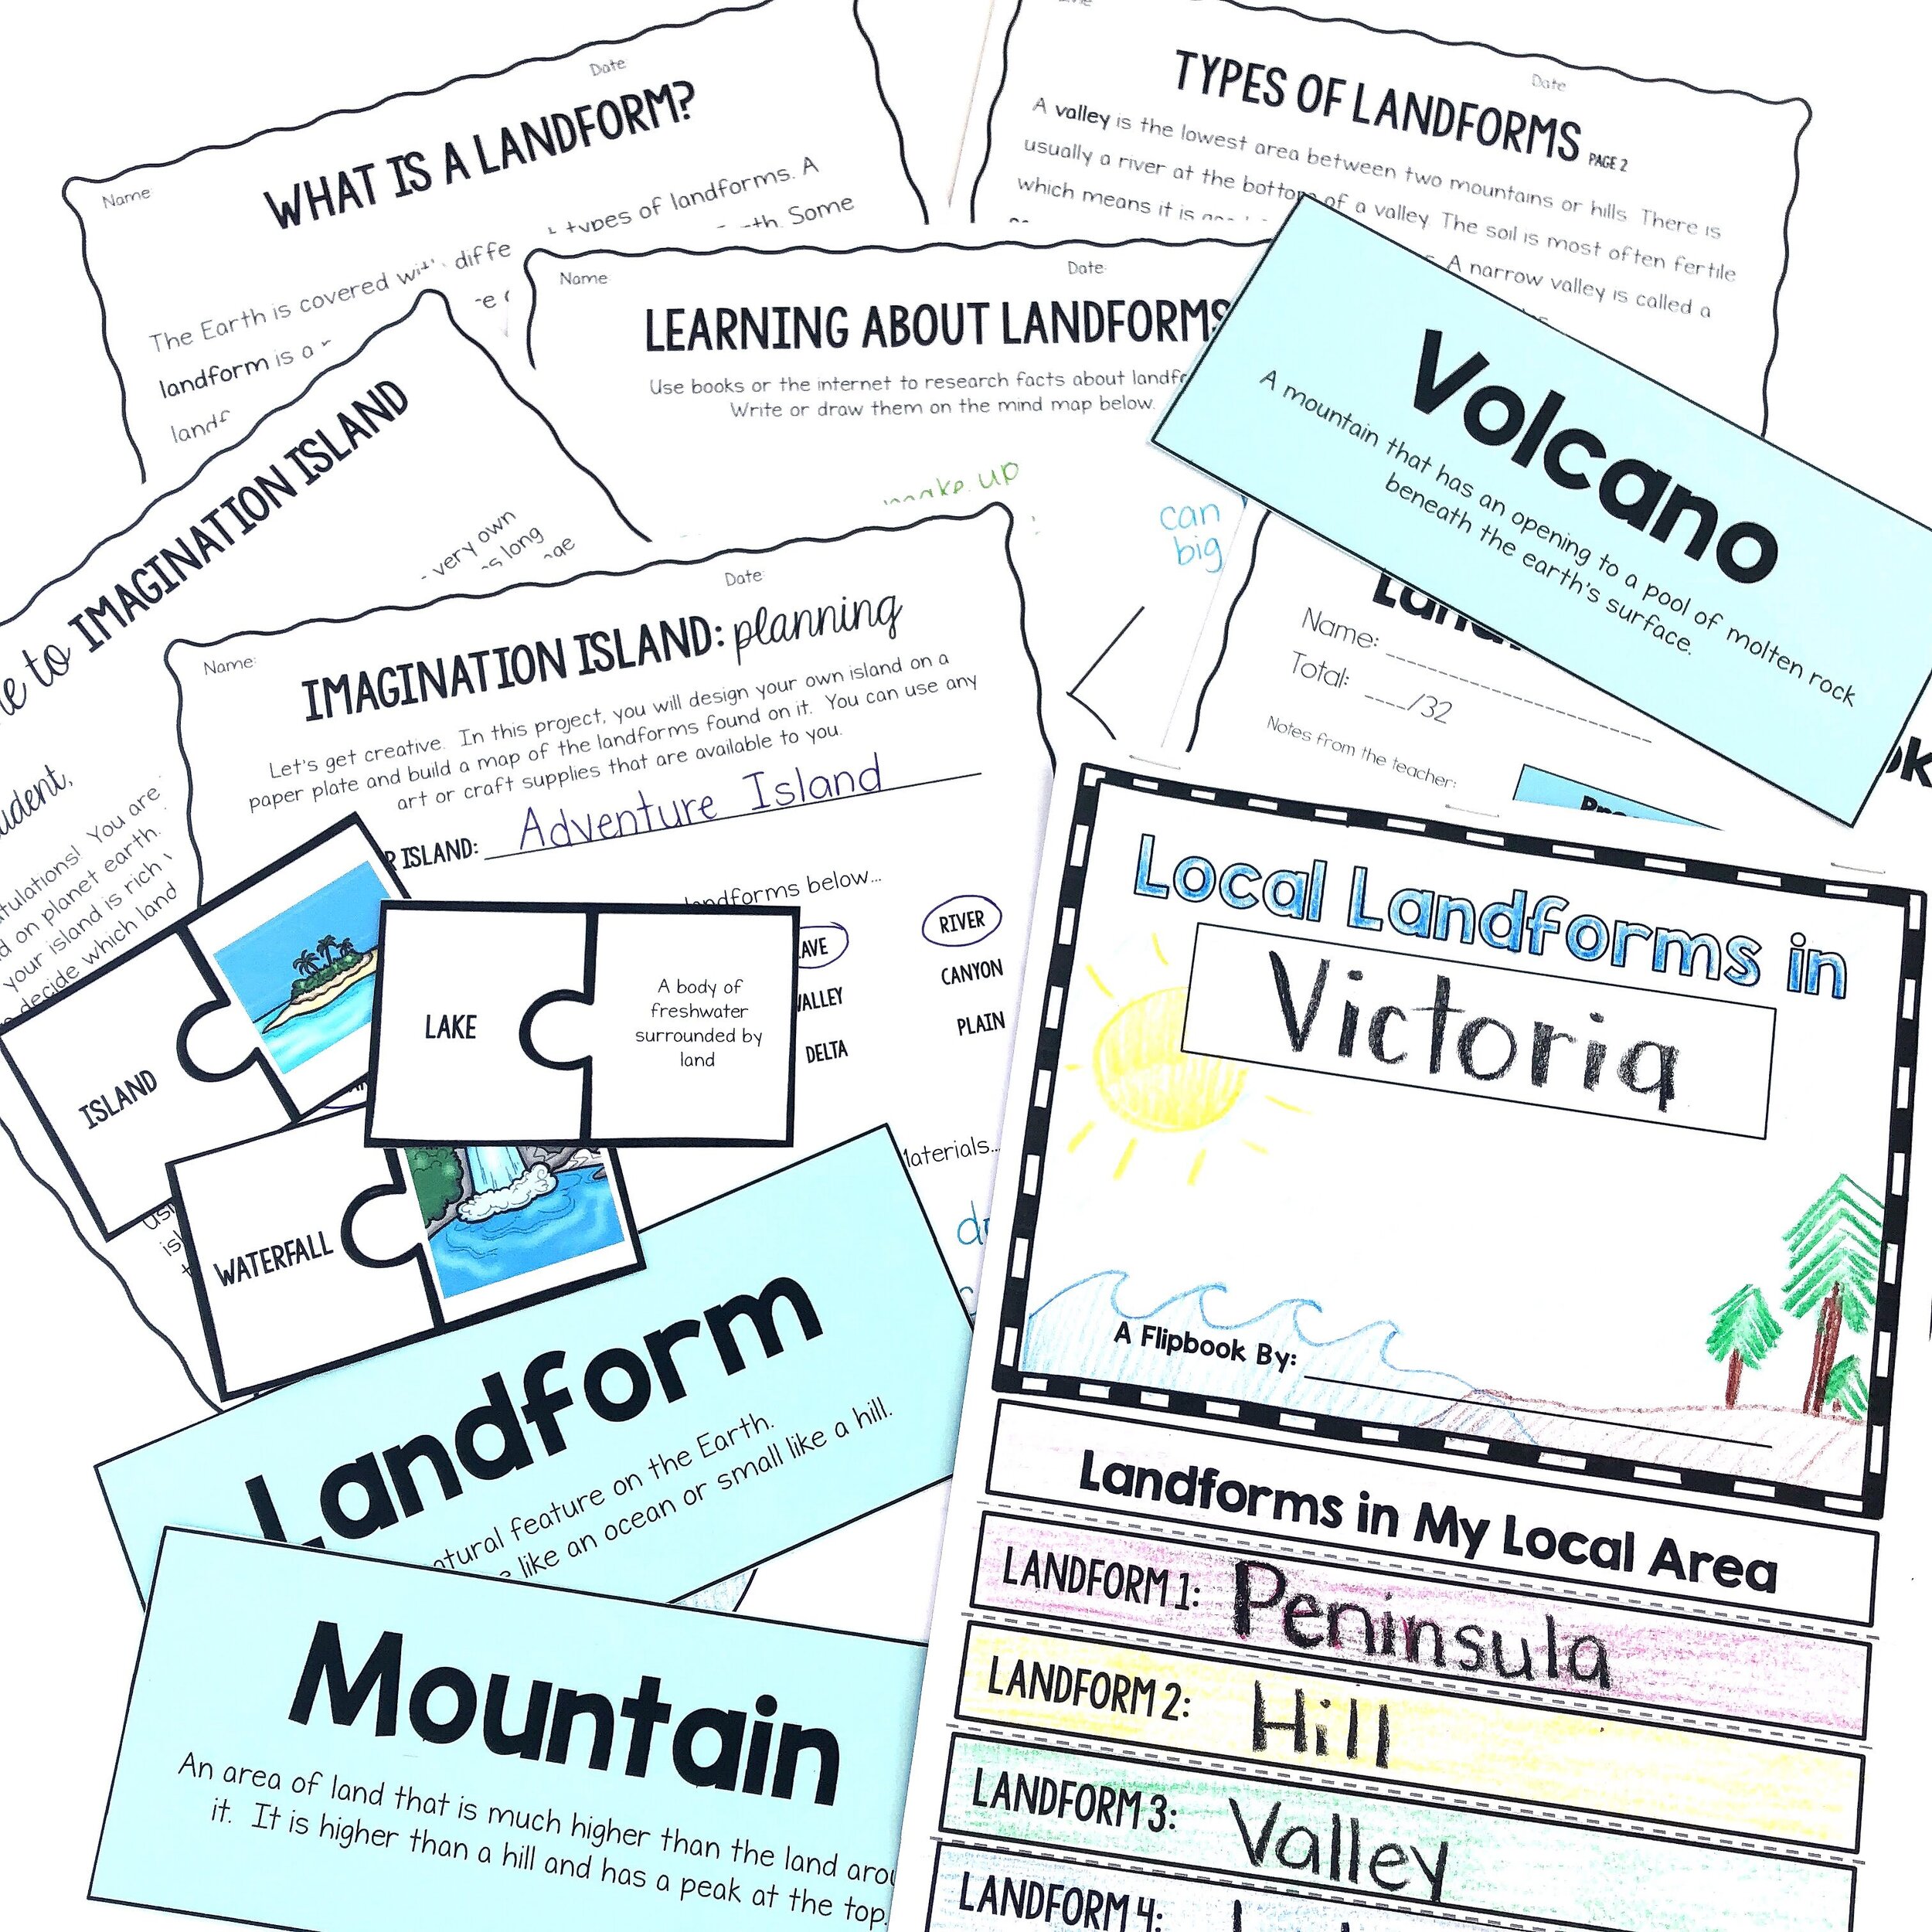
Our ‘Local Landforms’ flipbook project.

Our ‘Local Landforms’ flipbook project.

More local landforms? Shocking!  But I really do believe in making local connections to the curriculum wherever possible. We ended our landforms unit with a flipbook project that asked students to think about all of the local versions of as many landforms as we could think of.  A local lake, a local waterfall, a local valley, a local desert, a local cave, a local ocean, etc.  It was neat to watch them make connections to places they had all been or heard about. We also used our classroom devices to research places to help fill gaps for students who hadn’t had firsthand experience with each place and to add facts and details about each location. I, personally, had never been to a local waterfall, so this research component was helpful for me as well!

Teaching-Landforms-Button

Let me plan your landforms unit!

Looking for a whole unit?  The complete landforms science unit features nonfiction reading passages, vocabulary, teacher-led lessons, FUN activities, project-based learning, and detailed lesson plans all along the way.  Let me take this off your plate!

Pin me to save these ideas for later!

Local-Landforms (3).jpg
How is Thermal Energy Transferred? Science for Kids

Teaching about how thermal energy is transferred in elementary science is so much fun because it’s a great unit to get totally hands-on. We build, we try, we experiment, and we really explore the different ways that heat is transferred. Here are some of my best ideas, experiments, tips, and tricks for teaching about thermal energy specifically for kids!

thermal-energy-science-lessons.JPG

When do you teach thermal energy in the classroom? 

I really don’t think it matters when you are teaching thermal energy, each season has its own benefits when you’re teaching about how heat is transferred.  I’ve always taught it during the winter when we can dive in to the concepts of conductors and insulators (because brrrrr, it’s cold outside). This way, we can warm up with a conducting mug of hot cocoa.

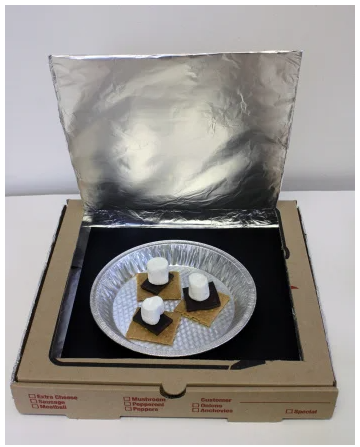
However, the spring/summer also works, because feeling the warmth of the sun allows kids to make great connections about how the sun is radiating heat.  Plus, a warm sun helps some fun projects, like this solar oven, really work!

The only timeline I follow is that I make sure I’ve covered ‘matter’ first in my curriculum. So many of our discussions about thermal energy and heat transfer refer to ‘particles’ and I want the kids in my science classroom to have a good understanding of matter, and how particles move in different states of matter.  I don’t want them to be confused when I mention that “the atoms bump into each other”, because we’ve already covered ‘what is an atom’ in previous lessons!

Where do you start with thermal energy?

I start every single science unit with a handful of teacher-led lessons.  Before we head into the experiments, inquiry, and student-led learning portions I always spend a class or two teaching vocabulary and new concepts.  I find that front-loading this knowledge gives students the confidence to explore and ask questions later on. 

In this time, we usually do some non-fiction reading about our new science topic (either reading passages at my students’ level, or books from the library) and then head to vocabulary practice.  I’ll set up a Science Word Wall with our new vocabulary and we’ll play some hands-on games until students are familiar with the vocab for our unit.  In thermal energy, I want them to be comfortable with words like convection, conduction, radiation, energy, conductor, insulator, and atom before we even begin.  

Get hands-on with experiments

Learn about the ways thermal energy is transferred in as many hands-on ways as possible. While teacher-led learning is fine, hands-on experiences is what will make the learning ‘stick’.  So when I’m teaching thermal energy I try my best to have as many hands-on science activities as possible.  

To teach conduction, we’ll have tea (or hot cocoa!) together.  If you are allowed to share beverages with your students, this is a great chance to make science class extra special!  Pour each student a warm mug of tea and allow them to hold the warm, but not too hot, mug in their hands.  They will feel the heat transfer rom the mug into their cool hands. This is conduction! 

To teach radiation I like to get outside on a warm and sunny day to feel the sun radiate and warm up our bodies.  Too cold for this?  Try gathering around a space heater!  (The heat from a candle is also radiation... but feel the heat from this one with caution around little hands!) 

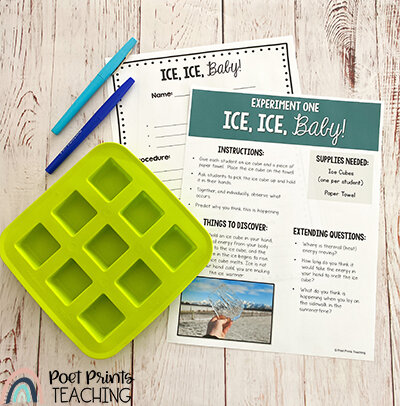
I love experiments that need very few supplies.  In my first few years of teaching, I had access to very few additional materials at my school. My budget was unbelievably small (teacher life!) So my desire is always to find activities that can be done in classrooms for almost no money.  Ice Ice Baby is one of my favorites.  If you can freeze a class set of ice cubes, you are set! This experiment asks students to MELT an ice cube in their bare hands to experience heat transfer from their warm palms into the frozen ice cube. The full set of instructions for this fun and simple experiment can be found in my Thermal Energy Science Unit.

Have a bit more time and a few more supplies?  These instructions guide you through how to use heat energy to make s’mores in a classroom solar oven!

thermal-energy-digital-version.jpg

Let us plan your thermal energy unit!

Looking for a whole unit? The complete thermal energy science unit features nonfiction reading passages, vocabulary, teacher-led lessons, 3 hands-on experiments, a quiz, and detailed lesson plans all along the way.  No planning needed, just print and that’s it!


Biodiversity Science Lessons

There's something about being outdoors that is good for the soul. Thankfully, I live on the west coast of Canada so there are easily a half-dozen beaches within a ten-minute drive from my house, and they are stunning. Every time I go, there is something new to explore and discover. Biodiversity is a key part of our grade 3 science curriculum here in British Columbia and, between you and me, it's one of my favorite units to teach. There is just so much to unpack and the science lessons lend themselves so beautifully to student-centered learning. Take a peek at my ideas, activities, and tips for teaching biodiversity (the diversity of life) in elementary science.

Biodiversity: Lesson ideas, projects and freebies that teach all about our great big world. Image: a globe is pictured falling into a pool of water.

Biodiversity: Lesson ideas, projects and freebies that teach all about our great big world.
Image: a globe is pictured falling into a pool of water.

keep the biodiversity local

We always study our local biodiversity. While teaching about biodiversity in Africa may seem exciting, (yay for lions and tigers and zebras!) there is so much biodiversity in our own backyard. Teaching about the local diversity of life helps to give my students an appreciation for the plant and animal life that exists right where we are!

get outside

I like to teach our biodiversity science lessons when the weather is most likely to be nice (although, on the wet west coast, nothing is guaranteed), so that we can head outside to try and observe biodiversity in our own schoolyard.  

A number of times throughout the unit we will take a walk on our school grounds or in the neighborhoods surrounding our school. If your school policies allow this, a neighborhood walk is a free and fun field trip! We will head out with cameras or sketchbooks to make notes of the many different plants and animals that we observe on our way.  My students are often so surprised at the wide variety of bugs/insects/plants/birds that they can find in just a short 20-30 minute walk.

If you are able to bring a couple of smartphones (I had parent or high school volunteers come for this), the app Picture Ths is great for identifying local plants. If this isn’t possible, the app also works from a picture! Students can snap photos of local plants near their homes, and you can identify them using the app at school from submitted photos.

follow student passions

Towards the end of our study of biodiversity, we move to student-led learning. After students are familiar with ecosystems, food chains, living and non-living things, and the components of our local ecosystem, it’s time for a little project-based learning.  I let each student pick which part of our study of biodiversity interests them and RUN with it.  I once had a student do a project on a species of local moss... not my first pick but it made him very excited to research!

Students zero in on one specific plant or animal and do more in-depth research.  They place their subject into an ecosystem, learn about its place in the food chain, discover its diet, and explore any predator and prey relationships that it is a part of. The student becomes THE classroom expert on this plant or animal.

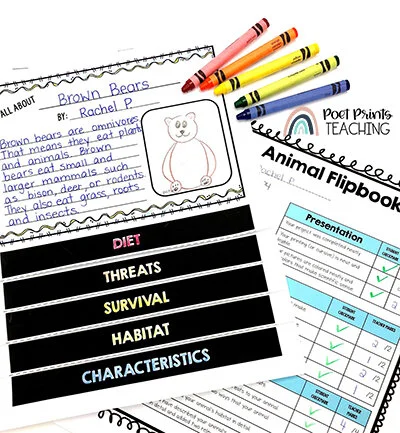
Image: An animal flipbook project on brown bears is displayed on a table.  A flipbook rubric is behind the brown bear project.

Image: An animal flipbook project on brown bears is displayed on a table. A flipbook rubric is behind the brown bear project.

We use my digital and printable animal research templates to complete these projects.  It ends up being so fun to watch students dive deep into something they care about.  At the end of the unit, we work together to come up with a way to share their learning.  Some years we do formal presentations.  Other years, we set up a ‘gallery walk’ where other classrooms can learn a bit about each animal.  My personal favorite was the year we filmed each student presenting their animal like they were the host of a Discovery show, and compiled all of the presentations into a class movie! 

Biodiversity (1).jpg

Let us plan your biodiversity unit!

Looking for a whole unit? This complete biodiversity science unit features nonfiction reading passages, vocabulary, teacher-led lessons, project-based learning, a guided inquiry project, small group projects, and detailed teacher instructions all along the way.  No planning needed, just print and that’s it!

“This fits in great with the BC Grade 3 Science curriculum. My 3s are enjoying the activities and I like that there are reading passages with questions for them to answer. So far we are half way through the unit and everyone is excited when it is time for Science! Thanks!” - Denise M. (A real-life teacher using the Biodiversity Science Unit in her classroom!)

Teaching The Water Cycle - 4 Creative Ideas

Integrating multiple subjects together is one of my favorite ways to teach.  I look at almost any social studies or science unit and try to think about how I can weave my other subjects into it as well.  It’s engaging for students and so convenient for me (hitting multiple learning outcomes at once… yes please!) Teaching the water cycle is one of my favorite science units because it naturally lends itself to so much cross-curricular integration.  These water cycle activities are engaging for students and just so interesting to teach.  

Teaching all about the water cycle in 2nd and 3rd grades.  Picture: A child stands in the rain under a rainbow umbrella.

Teaching all about the water cycle in 2nd and 3rd grades.
Picture: A child stands in the rain under a rainbow umbrella.

Teach About Water with Picture Books

Before we even start looking at the science of water, I want my students to understand why we are studying water in the first place.  From a guided-inquiry perspective, we are looking at the question Why is water important? I like to put this question on a bulletin board or make an anchor chart that we will refer to.

My favorite picture book to use as we explore this question is “One Well: The Story of Water on Earth” by Rochelle Strauss”. One Well is a beautifully illustrated non-fiction book that walks us through the different ways that water is used, consumed, and threatened on our planet.  From the jacket:

“One Well” by Rochelle Strauss and ”Hope Springs” by Eric Walters are displayed on a table.

“One Well” by Rochelle Strauss and
”Hope Springs” by Eric Walters are displayed on a table.

“Imagine for a moment that all the water on Earth came from just one well. This isn’t as strange as it sounds.  All water on Earth is connected, so there really is just one source - one global well - from which we all draw our water.  All living things depend on Earth’s One Well.  Life would be impossible without it.  But the water in the Earth’s well is threatened by our growing population and increased demands.  What can we do to protect it? One Well answers this important question while telling the eye-opening story of water on Earth.”

For older students, Hope Springs, by Eric Walters, is a great picture book about limited access to water.  Hope Springs is a story about Boniface, an orphan in Kenya during a season of drought. The book shines a light on the reality that many people in the world live in fear that there is not enough water for them to survive. Although the book deals with heavier content, the story is ultimately one of hope and kindness.  It’s a great book to tie the water cycle, and water conservation, into a greater global context. 


Don’t have a picture book that works? These differentiated reading passages all about water on earth a great way to introduce where water can be found on earth (and show students just how scarce freshwater is!)


“A Day Without Water” lapbook project is displayed on a table.

“A Day Without Water” lapbook project is displayed on a table.

Imagine a Day Without Water

It’s so easy to take for granted the easy access we have to water, and how often we use it!  Think about all of the times you have used water before you arrived at school.  Did you brush your teeth? Wash your face? Grab a drink? Have a shower? Rinse your plate? Turn on the sprinklers on your lawn? This lapbook project asks students to stop and imagine that, for just one day, all of their taps ran completely dry!  What would their day look like? What would be different? 

After this writing project is complete, I like to use this as an opportunity to help students connect to others who may experience limited access to water on a daily basis.  This is a great chance to talk about ways that, as a class, you may be able to help.  (Can you fundraise together? Write cards? Collect supplies?)

Teach the Stages of the Water Cycle

This one might seem obvious, but when we are teaching the water cycle, we like to get hands-on with activities and classroom displays that help students to understand the stages of the water cycle.  

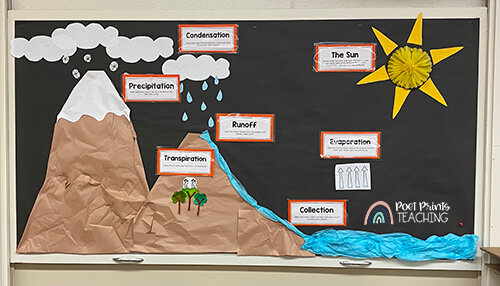
This bulletin board uses the vocabulary cards from the Water Cycle unit to display the stages of the water cycle in a way that is clear for students to understand and provides a great reference for them to come back to as the science unit goes on. I also have also had students cut/glue the stages of the water cycle onto a fun worksheet (or complete it in a digital, Google Slides version) so that they are very familiar with the stages and the vocabulary!  

water-cycle-bulletin-board.jpg

This water cycle in a bag science experiment is such a fun and hands-on way to learn about the stages of the water cycle.  I love how it uses cheap everyday materials that you probably already have in your classroom.

Make a Plan to Conserve Water

Water Cycle inquiry flipbook project.

Water Cycle inquiry flipbook project.

Once students understand the water cycle and have explored our inquiry question why is water important, we like to end the unit with a small guided inquiry activity.  This project puts students in the driver’s seat and asks them to ask the big questions about conserving water.  Students get to choose their own focus and create a flipbook to address the problem that they see!

Have any more activities to go with our water cycle unit?  I’d love to hear about them!  Leave a comment below or connect with me on Instagram

A Complete Water Cycle Unit is Here!

Looking for a whole unit? This complete water cycle unit features project-based learning, a guided inquiry project, directed lessons, small group projects, vocabulary games, and detailed teacher instructions all along the way.

No planning is needed, just print and that’s it!

Life Cycles of Animals and Plants: 6 Engaging Ideas

Spring is in the air, can you feel it? As the weather starts to warm up, and we start to thaw out a little bit up here in Canada, it’s the perfect time to think about our next set of science lessons. Spring is my favorite time to teach about life cycles because we can naturally observe them all around us. If teaching about the life cycles of living things is on your science lesson plans this spring, take a peek at six of my favorite ways to keep students engaged as we study how plants and animals grow and change.

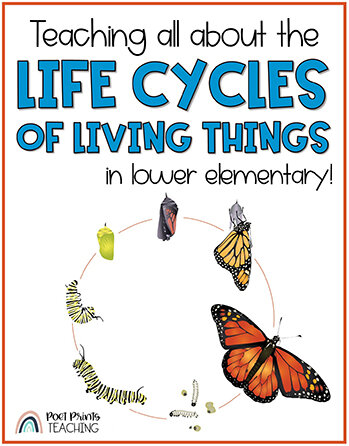
Teaching all about the life cycles of living things in lower elementary. The life cycle of a butterfly is depicted.

Teaching all about the life cycles of living things in lower elementary. The life cycle of a butterfly is depicted.

1. Grow plants in the classroom

A student observes a bean plant and writes in a plant observation journal.

A student observes a bean plant and writes in a plant observation journal.

Study the life cycle of a plant in a hands-on way by planting a bean seed in a simple plastic cup in your own classroom. (You can read all about how we used inquiry-based science to grow and study our bean plants here!) Then, we use plant observation journals to make note of the various stages of plant growth, and track the growth on a simple graph (hello, math integration!). Watching students get excited about growing their own bean plant never gets old. I’ve done this activity year after year, and I’m always amazed at how many students decide to continue growing their bean plants at home. 

2. Set up a Student-Led Reading Station

Gather books about the life cycles of plants and animals and set them up in  a reading station in your classroom.  In a perfect world, these should be available from your school or district library, but your local library may also have titles available.  Ask your students which plants and animals they are interested in! Give students time during silent reading or science to freely explore the books and learn more about the plant or animal of their choice.  Need a few reading passages at students’ levels for your station? Grab my free digital and printable life cycles of living things reading passages (with comprehension questions) to add to your reading station!

3. Head outside and observe life cycles in your neighborhood.  

If are able, walk around your school property or neighborhood in the spring! Point out buds on trees, flowers, and things sprouting from the ground. Bring notebooks and pencils to sketch examples of living things and moments in the life cycle of a plant or animal. 

4. Get hands-on with a life cycles project

Life Cycles of Living Things (4).jpg

Read about the different stages in the life cycle of a salmon and create a fun flipbook project to help students show what they’ve learned.  It’s the perfect way to integrate non-fiction reading into your science lesson. This project is part of the complete Life Cycles of Living Things science unit for second grade. 

Teach Plant & Animal Life Cycles Today!

Looking for a FAST way to plan out your life cycles unit that includes 2 full weeks of ideas? In just a few clicks you can grab all of the pieces you need: vocabulary, nonfiction reading, projects, activities, and more! Click and print. Planning is really that easy.

5. Observe a Life Cycle

Observing a complete life cycle is such a fun way to get students engaged in science.  This can be done in a few different ways:

 6. Watch YouTube videos about the life cycle of animals

Sometimes videos can give students great visual representations about simple life cycles.  Check out some of my favorites at a few different levels.

Text: Teaching all about the life cycles of living things in second and third grades.   Image: A child looks into a tank at an aquarium.

Text: Teaching all about the life cycles of living things in second and third grades.
Image: A child looks into a tank at an aquarium.

Physical and Chemical Changes - Science Lessons for Kids

What do you do when a topic seems too tricky to tackle? Up here in British Columbia, our Grade 2 Science curriculum specifically covers 'Chemical and Physical Changes' - students are expected to understand that materials can be changed through physical and chemical processes. It's a much more complex version of the question "Can this change be reversed?"

How to teach physical and chemical changes in lower elementary.

How to teach physical and chemical changes in lower elementary.

Keep Science Lessons as Hands-On As Possible

At the beginning of second grade, many students are still 7 years old. Where our lessons on force and motion had a lot of familiar language, this chemical and physical change vocabulary can seem new and overwhelming. At the beginning, students find it hard to tell the difference between a chemical and a physical change.

When trying to teach this to elementary students I've found that HANDS-ON has been (by far) the most effective method. When students can see, touch, and create different chemical and physical changes it's so much easier for them to discern the difference between the two.

Along with using proper terminology (I drill the words "chemical change" and "physical change" into their heads over and over during their entire unit!) we make sure to stop and practice these changes over and over.


Nonfiction reading passages: Reversible and Irreversible Changes

Some curriculums and school districts don’t use the terminology ‘chemical change’ and physical change’ - they go a little simpler with ‘reversible and irreversible changes’. In the NGSS for 2nd grade this is as deep as it goes. This set of nonfiction reading was designed to work with curriculums that use the ‘reversible and irreversible’ change vocabulary - but it’s a great starting point for any science lesson on this topic!


Begin with Teacher-Led Lessons to Build a Solid Foundation

Is the change physical or chemical? A Science anchor chart.

Is the change physical or chemical? A Science anchor chart.

We start our physical and chemical changes unit by front-loading information that will help them along the way. Together, we define the terms "chemical change" and "physical change" on an anchor chart (they complete their own mini-version in their science notebooks too!). Then, we work in pairs or small groups to talk about potential changes, and why they might be chemical or physical. It's a simple activity, but it helps to bring focus back to the anchor chart as they think about the questions we posed: Is something new being created? Can this be reversed? What can we observe?

Use science stations to give a real-life experience

My BEST way to help students to really discern the difference between a chemical and physical change is to try it out in as many experiments as possible. I do this using stations. Using science stations gives my little scientists a chance to use the scientific method (that we learned about here!) to test what they know about changes and decide if their experiment resulted in a physical or chemical change. I set up six different stations in the class, and we rotate through them. There are a few different ways you can do science stations in an early elementary classroom.

  • Set up six identical stations and have all students complete the same station at the same time. This one works best if your class is a little less mature and you feel they will need a lot of guidance to move through the stations. Then complete the stations over a number of different days.

  • Set up only one or two stations, with multiple stations of each. (i.e. Set up three ‘A’ stations, and three ‘B’ stations, and divide your students into 6 groups). This also reduces the number of different Science experiments you have to manage and set up at one time. The next day, set up two different sets of stations.

  • Set up 6 different stations at once. For students who are comfortable working independently in small groups, this one is my personal favorite. If we are completing this unit in the 2nd half of the year, I tend to lean towards this option. We will set up 6 different science stations, and put one group at each station. I find this option to be difficult at the beginning when small group skills are still being developed.

chemical-physical-change-station.jpg

Physical & Chemical Change Science Lessons

It’s easy to teach about physical and chemical changes with this set of scripted lesson plans! Nonfiction reading, 6 science stations, lessons, and vocabulary are all included!

Print and teach. It’s that easy.

physical-and-chemical-changes-pin.jpg