Posts in third grade
3rd Grade Narrative Writing: Finding Ideas

One thing I love to teach in 3rd Grade is Narrative Writing. Third Grade is the time when students can really engage with creative writing, the writing process and narrative writing. I especially love to teach students about finding ideas. So often our students have ideas locked inside their minds and they need the proper key in order to unlock all these great ideas. One of my favorite ways to unlock their great ideas is by using their favorite books and novels! It’s so funny how kids can go from completely stuck to full of ideas in the blink of an eye and this writing lesson totally helps with the question, “I don’t know what to write about!”

Text: Narrative Writing in Third Grade, Finding Writing Ideas Image: Text is displayed over sharpened pencils.

Text: Narrative Writing in Third Grade, Finding Writing Ideas
Image: Text is displayed over sharpened pencils.

Where Can Ideas Come From?

Image: “Ralph Tells A Story” by Abby Hanlon is displayed on a student desk.

Image: “Ralph Tells A Story” by Abby Hanlon is displayed on a student desk.

So let’s talk about these ‘keys’ for a minute. As I said before, students often have ideas locked inside their minds and they need the proper key in order to unlock these great ideas. Where can Ideas come from? Kids are often stuck and need help finding ideas. I love using books to inspire ideas. I especially love the picture book “Ralph Tells a Story” for this. 

Ralph is a boy who really struggles to find an idea of what to write about. Over the course of the story, Ralph discovers that there are stories all around him! He could write about an inchworm in his backyard, the class goldfish, the markers in his desk….the stories are endless! My reluctant writers love this book because it’s funny and gives solutions for how to unlock their ideas. 

There are some other amazing books about finding ideas for writing..

  • “What Do You Do with an Idea” by Kobi Yamada

  • “Idea Jar” by Adam Lehrhaupt

  • “Any Questions” by Marie-Louise Gay

Do you know of any other amazing books about ideas for writing? Send me a message, I’d love to add them to my list!

Use Books Students Love to Find Ideas

When teaching my students about narrative writing my absolute favorite thing to do is have students use books they already love to find ideas. I want to teach my students to draw on the books they are reading to inspire a new story during personal writing time. I like to tell my students that “Authors are inspired by what other authors have written”. So I want to teach my students to be inspired by the books around them. 

So the first step that I take while teaching this lesson is to brainstorm. We brainstorm stories we already know and love. Then we think of new adventures and ideas for these characters.

  • Scaredy Squirrel - Let’s write a new adventure where Scaredy heads into space!

  • The Magic Tree House - Jack and Annie visit our classroom!

  • Who Would Win Books - We could write Butterfly vs. Bumblebee or Raccoon vs. Chihuahua 

Once students start thinking about books they are already reading, it gets easier for them to think of new ideas for the characters or book style! 

Model How to Create a New Story

Don’t forget to verbally model your through the process while you brainstorm. Students need to see how the writing process works. Creative writing first starts with creative thinking. Narrative writing begins with an internal dialogue with yourself. So don’t forget to model each step of the writing process during the writing lesson. This helps to prepare them for when they brainstorm their own story.

Wow!  We sure love Scaredy Squirrel! He’s so funny and he gets into so many silly adventures.  I wonder what else he could possibly get into?  Hmmm.  We’ve seen him be terrified to head to the beach.  I wonder how he’d feel about going to space!  What kind of things would he be scared of? How would he plan to head into zero gravity? What would he bring with him?

Write the Story 

After brainstorming ideas, I model how to create a new story. Then students will plan their story and then begin to write. After writing, I always give my students time to edit and then write their good copy. Sometimes I even let my students type their good copies on the computer.

In my Book Inspiration Writing Lesson package, I have a planning page, writing pages, and a checklist to help with their editing. There is even a digital template included in this package so students can type their good copies into a well-laid-out template.

narrative-writing-ideas.jpeg

Spend less time planning!

Looking for a FAST way to plan this writing lesson? In just a few clicks you can grab all of the pieces you need: a lesson plan, planning pages, rough and good copy student sheets, and assessment! Just print… that’s it.

Share The New Story

One thing that I’ve learned over my years of teaching is that it’s important to give students a chance to share their work. This gives them a sense of ownership of their work and it also instills pride for their hard work.

I like to mix up the way my students share their work. Sometimes I’ll create a class library of these new books. Students can read each other’s stories! (As a bonus, this may also give them new ideas for their next piece of narrative writing.) 

Other times I’ll host an Author’s Chair, where students have a special place to share excerpts from their stories with their classmates. I’ve even had my students publish their stories digitally on a secured classroom blog so parents can read the stories at home. Parents love to check out their children’s creative writing.

As you can probably tell, I love teaching the writing process to my 3rd Grade students. There is something special about teaching them about creative writing and narrative writing. Do you have any fun ways to teach the writing process to your students? Do you have any “go-to” third grade writing lessons?

5 Ways to Teach Transition Words in Third Grade

First, kids learn letters. Second, they learn words. Then, they use phrases. Afterward, they use sentences. At some point, they learn transition words. Do you see what I did there? Transition words are important to help with the flow of writing. We, as adults, often use these words without even thinking about it. But we need to explicitly teach transition words to our students. So I thought I’d put together a list of some fun ways to teach transition words in third grade.

Text: 5 Ways to Teach Transition Words in Third Grade Image: Two pencils are displayed on a red background

Text: 5 Ways to Teach Transition Words in Third Grade
Image: Two pencils are displayed on a red background

How Do You Teach Transition Words in Third Grade?

I think we can all agree that transition words are important. But we’ve all seen writing where students just repeat the same transition words over and over. How many times have we read an essay that has “And then…..And then…..And then…..” It’s up to us to explicitly teach transition words to our students. Otherwise, we’re doomed to read “And then….” essays for the rest of the school year. There are a variety of strategies that we can employ to help students learn their transition words. 

1. Write a Class Story Together

One way that I love to teach transition words is through modeled class stories. I will set up my flip chart with some transitional phrases. It might look something like this:

Once upon a time, there was a __________ and a _________.

First they _________________

Next they ________________.

Afterwards, they ________________. 

Finally, they ___________________. 

It was a _________ day.

Students love filling in the blanks together. In the end you might end up with a story like this:

Once upon a time, there was a frog and a duck. First they had a swimming competition. Next they went for lunch at McDonalds. Afterwards, they had a jumping competition. Finally, they went to bed because they were tired. It was a long and busy day.

Students like to create class stories together and share their ideas. After doing a story as a whole class, you could put students into groups and have them create their own stories, using the same template. Or you could have students create stories individually. Personally, I like doing it as a large group and then as small groups, because this fosters cooperation and communication skills.

2. Use Your Fingers

When students start thinking about the order of events in their story, I get students to use their fingers as they say each event. This helps them identify the order or first, second, third….and so on. Now, it’s OK if they use the “first, second, third…” as transition words, but you’ll also want to teach them other words to expand their vocabulary and make their writing flow better.

3. Create a Simple How-To Book

This is a super effective transition word resource that teaches students to use 3-4 transition words to write a simple instructional ‘how to’ story. As a class, we create a book titled “How to Do Almost Anything in Four Easy Steps!”. This helps to get students in the mindset of writing their ideas in the correct order and teaches the importance of basic transition words. I find that this is a great lesson for the beginning of the year. 

In this package, you’ll find sequence word cards to display in your classroom, planning paper, a self-assessment tool, the class book title page, and a variety of story papers for students to write on. 

4. Video the Outcome

To take this above resource one step further, you can have students create a step by step guide of how to make a peanut butter and jam sandwich, and then video the outcome. One of my teacher-friends does this with her class each year. First, she shows this video of a Dad recreating his children’s instructions for making a sandwich. It’s quite funny!


 After watching this video, the students have to write down instructions for how to make a peanut butter and jam sandwich. What the students don’t know is that my friend takes their instructions and creates a video of herself following the instructions. At one point, she even put peanut butter on her face because the student wrote “Put peanut butter on face.” 

Yes, this is a messy and silly idea. However, after this lesson, her students were extra careful when sequencing their writing. 

5. Traffic Light Transitions

I stumbled across the video below all about Traffic Light Transitions. It would be so easy to turn this into an anchor chart for the classroom. Students can help you brainstorm different transition words or phrases that belong in each section. 

Teaching transition words doesn’t have to be complicated. Even simple methods like these will help students to grasp the concept. And remember, the more students practice, the more adept they become at using transition words in their writing. 

BONUS IDEA: Practice transition words in journals

I am a huge fan of journal writing in third grade, it’s one of my favorite ways to build relationships and formatively assess writing. Once we have learned transition words, and students have access to a bank of transition words, personal journals are a great place to practice using them on a regular basis. Retelling events from our week naturally lends itself to using transition words, so it’s awesome practice. You can snag some of my favorite journal prompts below!

Pin me for later!

Text: 5 Ways to teach transition words in third grade Image: School supplies are displayed on a piece of paper.

Text: 5 Ways to teach transition words in third grade
Image: School supplies are displayed on a piece of paper.

Grade 3 Science Lessons - Especially For Teachers in BC

I’ve spent most of my teaching career in grade three. I have a soft spot for grade three students. There’s something about the way that they are not-quite preteens, but no longer little kids that is the perfect sweet spot for learning. Teaching grade 3 science lessons are a lot of fun, we explore atoms and molecules, look at landforms around us, get outside with biodiversity, and even grow our own plants to see life cycles in person!

Text: Science Lesson for Grade Three Image: A student examines a beaker with a magnifying glass.

Text: Science Lesson for Grade Three
Image: A student examines a beaker with a magnifying glass.

Not teaching in BC? You might be looking for NGSS (Next Generation Science Standards) aligned lessons and ideas for 3rd grade. That’s over in this post: 3rd Grade Science Topics

how do you teach science in grade 3?

When it comes to teaching science lessons in grade 3, I’ve always taken the hands-on approach. I love how invested third graders are in project-based learning, and how willing they are to try an inquiry-based investigation. Grade 3 science is perfect for lessons like these! 

But don’t be mistaken, I don’t hand students a project-based learning activity and walk away. There is so much scaffolding that goes into hands-on projects. I start every single science unit with teacher-led learning to give students at least a little background information on our new topic.  We learn new vocabulary, read informational texts to build a knowledge base, and then set off on student-led learning. I find that this approach makes our project-based and inquiry-based learning way more successful.

what are the topics in grade 3 science?

In BC, our science curriculum is mainly guided by the BC big ideas.  The BC Big ideas for Grade 3 science are:

  • Living things are diverse, can be grouped, and interact in their ecosystems

  • All matter is made of particles

  • Thermal energy can be produced and transferred

  • Wind, water, and ice change the shape of the land

When teaching these as topics, I teach these ideas in 5 distinct topics:  Landforms, Matter, Thermal Energy, Biodiversity, Plants. To read an in-depth post on each topic be sure to click through!

Teaching Local Landforms

Science-lessons-landforms-header.jpg

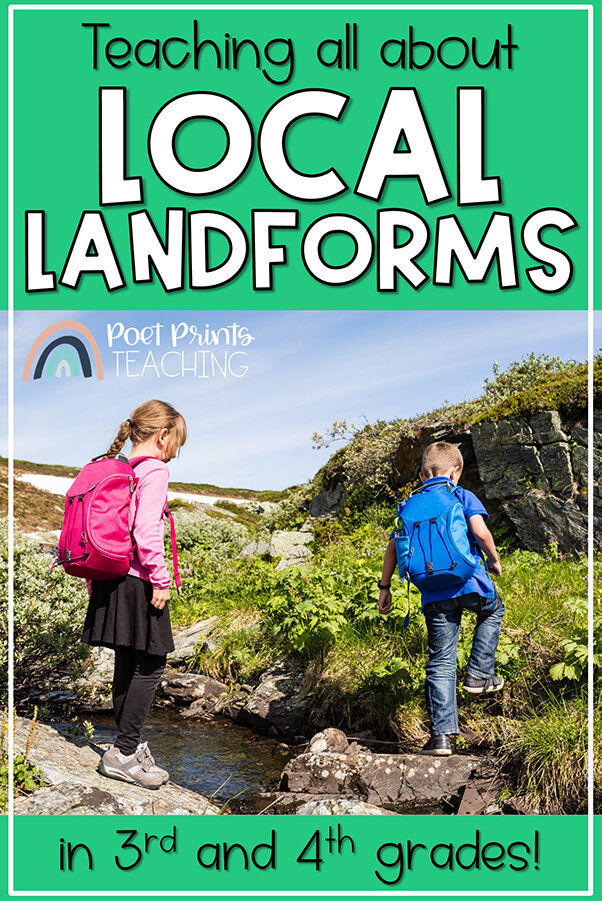
I’ve always been a big believer that science lessons can (and should!) be made as relevant to your students as possible. When we study landforms I try my best to connect each landform to ones in our local community or ones that may be familiar to my students. Mountains? I’ll choose the one we can see from our classroom. River? The local summer swimming spot. Lake? The one we visit during our last field trip of the year. The more I can connect our landforms unit to our local community the better. This post has my absolute favorite landforms projects and activities.


States of Matter Activities

states-of-matter-science-lessons-header.jpg

The three states of matter is a topic that our curriculum (here in BC) circles back to again and again… and with the right activities and lessons, it’s just so much fun! In Grade 3, we look at how all matter is made up of atoms, and what the atoms look like in a solid, liquid, and gas. We’ll build the particles out of classroom materials, act it out with our bodies, and get hands-on with experiments that show all three states. This post lays out how I introduce what matter is (and isn’t!) and some simple activities to get you started.


How is Thermal Energy Transferred? Science for Kids

thermal-energy-science-lessons-header.jpg

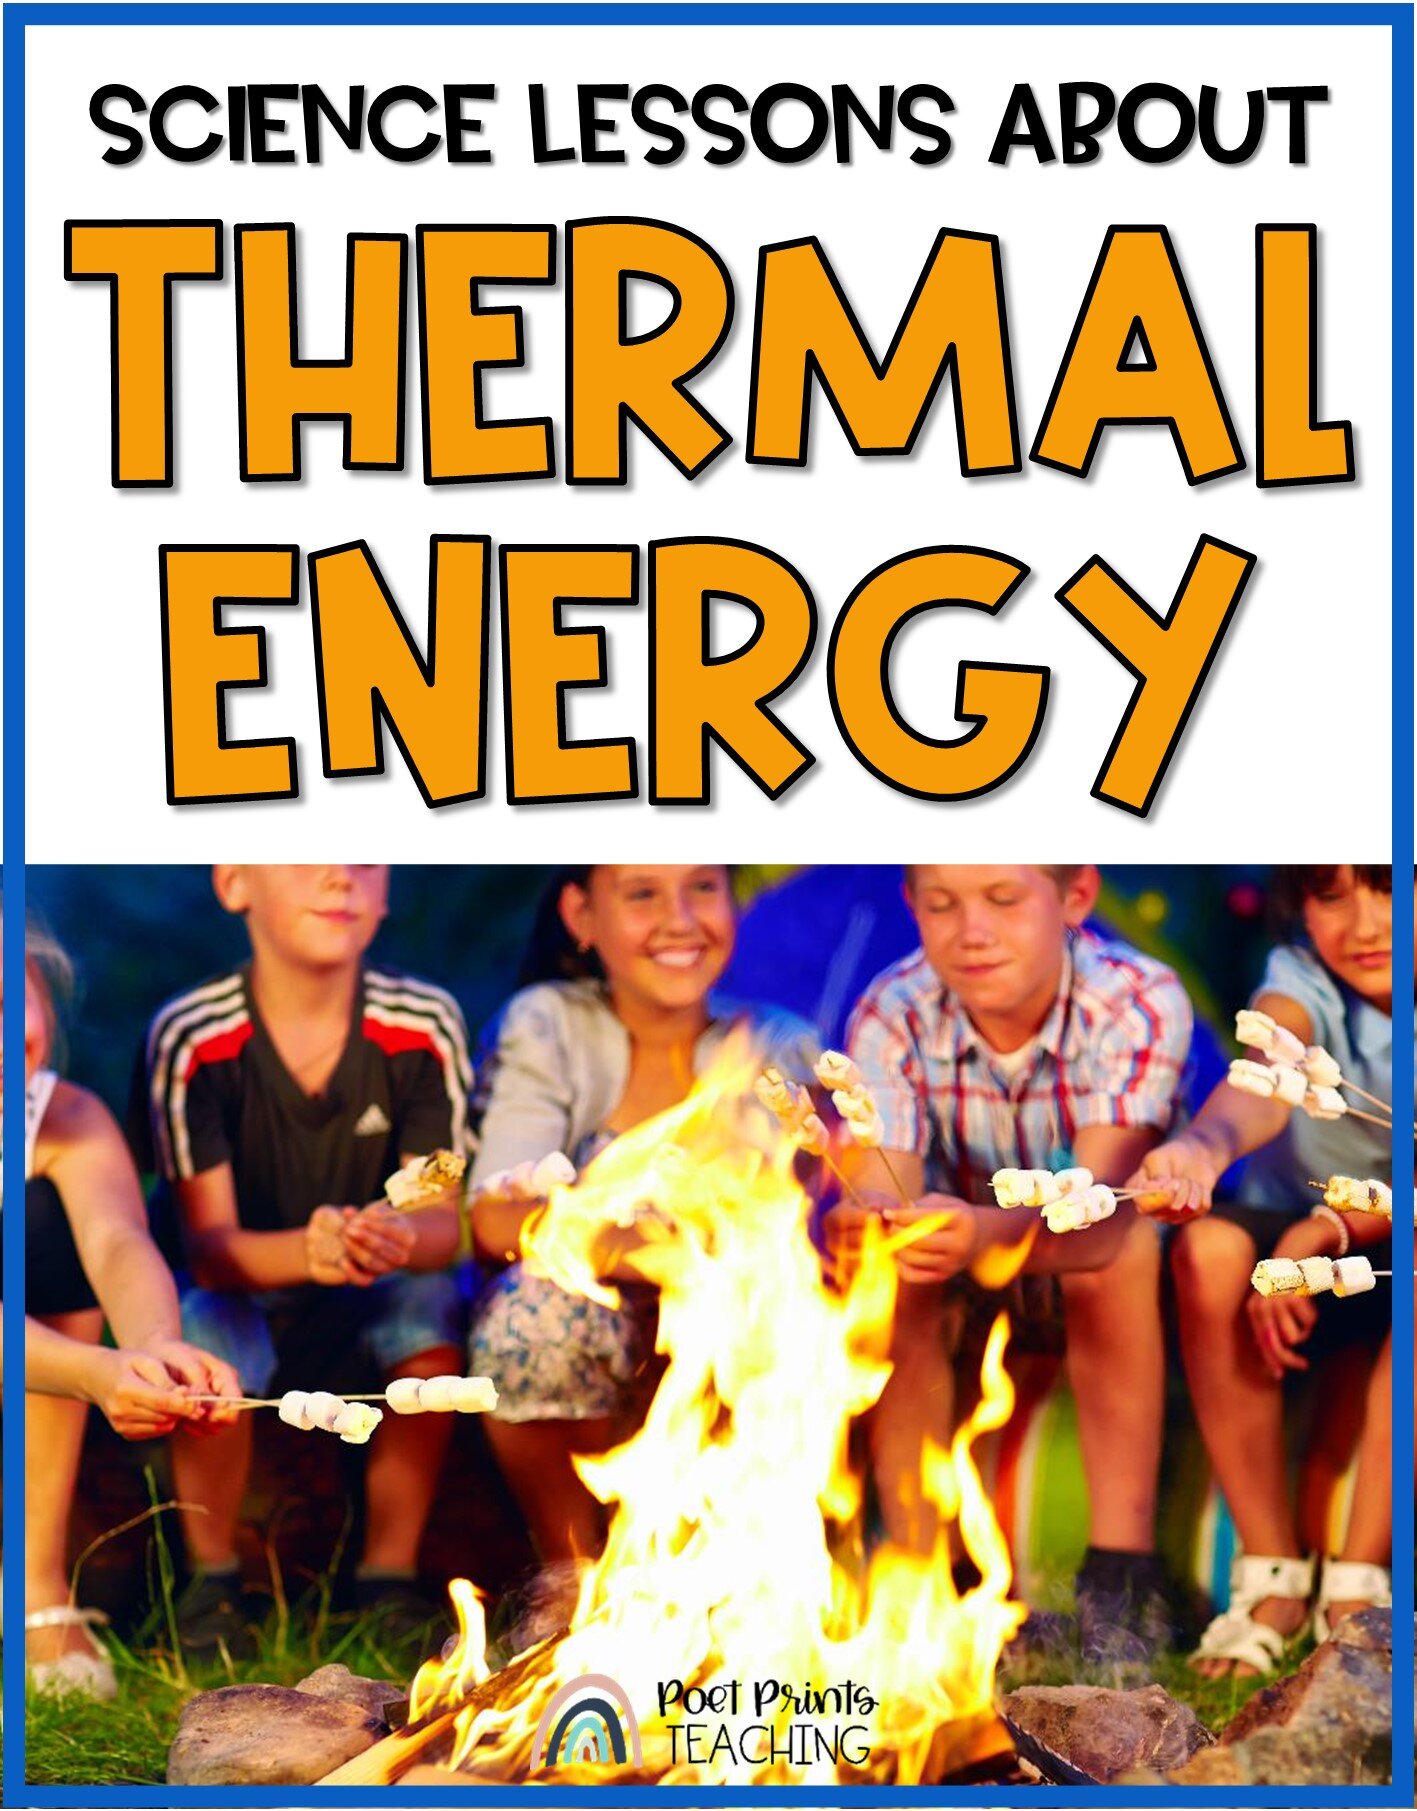
We learn about Thermal Energy after Matter so that students already have a good understanding of atoms and how particles move. I have always chosen to study thermal energy in the winter so that we can use hot cocoa to see conduction in action (as our hands warm-up) and try out various materials as insulators against the cold. There are so many fun thermal energy activities to try in your classroom!


Biodiversity Science Lessons

biodiversity-science-lessons-header.jpg

In our biodiversity unit students discover that biodiversity is literally ALL around us. This is a great unit for getting outside of the classroom. Kids love this unit because it looks so closely at plants and animals… and anything to do with animals is always a hit in grade 3. After we look at just how diverse our own local ecosystems are, I send students off to explore local biodiversity and choose a single plant or animal to research in greater detail.


Inquiry Based Science: How do Plants Grow?

I have found my plants unit to be the most successful as the final unit of the year. By this point in the year, students are capable of planting and tending to a small bean plant completely independently. They can also observe and document plant growth with little assistance from a teacher. I’ve usually conducted this unit as inquiry-based learning, and it’s always such a hit. These inquiry-based plant experiments are such great science lessons for grade 3.

Grade-3-Science-Lessons (5).jpg
Teaching Local Landforms

Teaching all about landforms is a big part of our grade three science curriculum here in British Columbia.  It’s one of my favorite units because it’s a topic that lends itself well to outdoor and interactive learning.  I try to ensure that teaching landforms is as hands-on as possible: we head outside to explore our own local landforms and we make as many student-led projects as possible!  A few things happen in my classroom to make a landforms science unit successful at the second and third-grade level… take a peek!

Text: Science Lessons About Landforms for 3rd and 4th Grades  Image: Text is displayed over an ocean landscape.

Text: Science Lessons About Landforms for 3rd and 4th Grades Image: Text is displayed over an ocean landscape.


Keep It Local

A ‘local landforms’ anchor chart.

A ‘local landforms’ anchor chart.

Teaching about landforms doesn’t have to be theoretical… there are landforms all around us! I’ve found that teaching about our own LOCAL landforms is the best way to hook students in and keep them invested in the unit as a whole.  (We did this in our biodiversity, water cycle, and plants units as well).  We try to make as many connections as possible to places and locations that are familiar to them. Even better if we can visit some of these places during our unit!


Pre-Teach Vocab

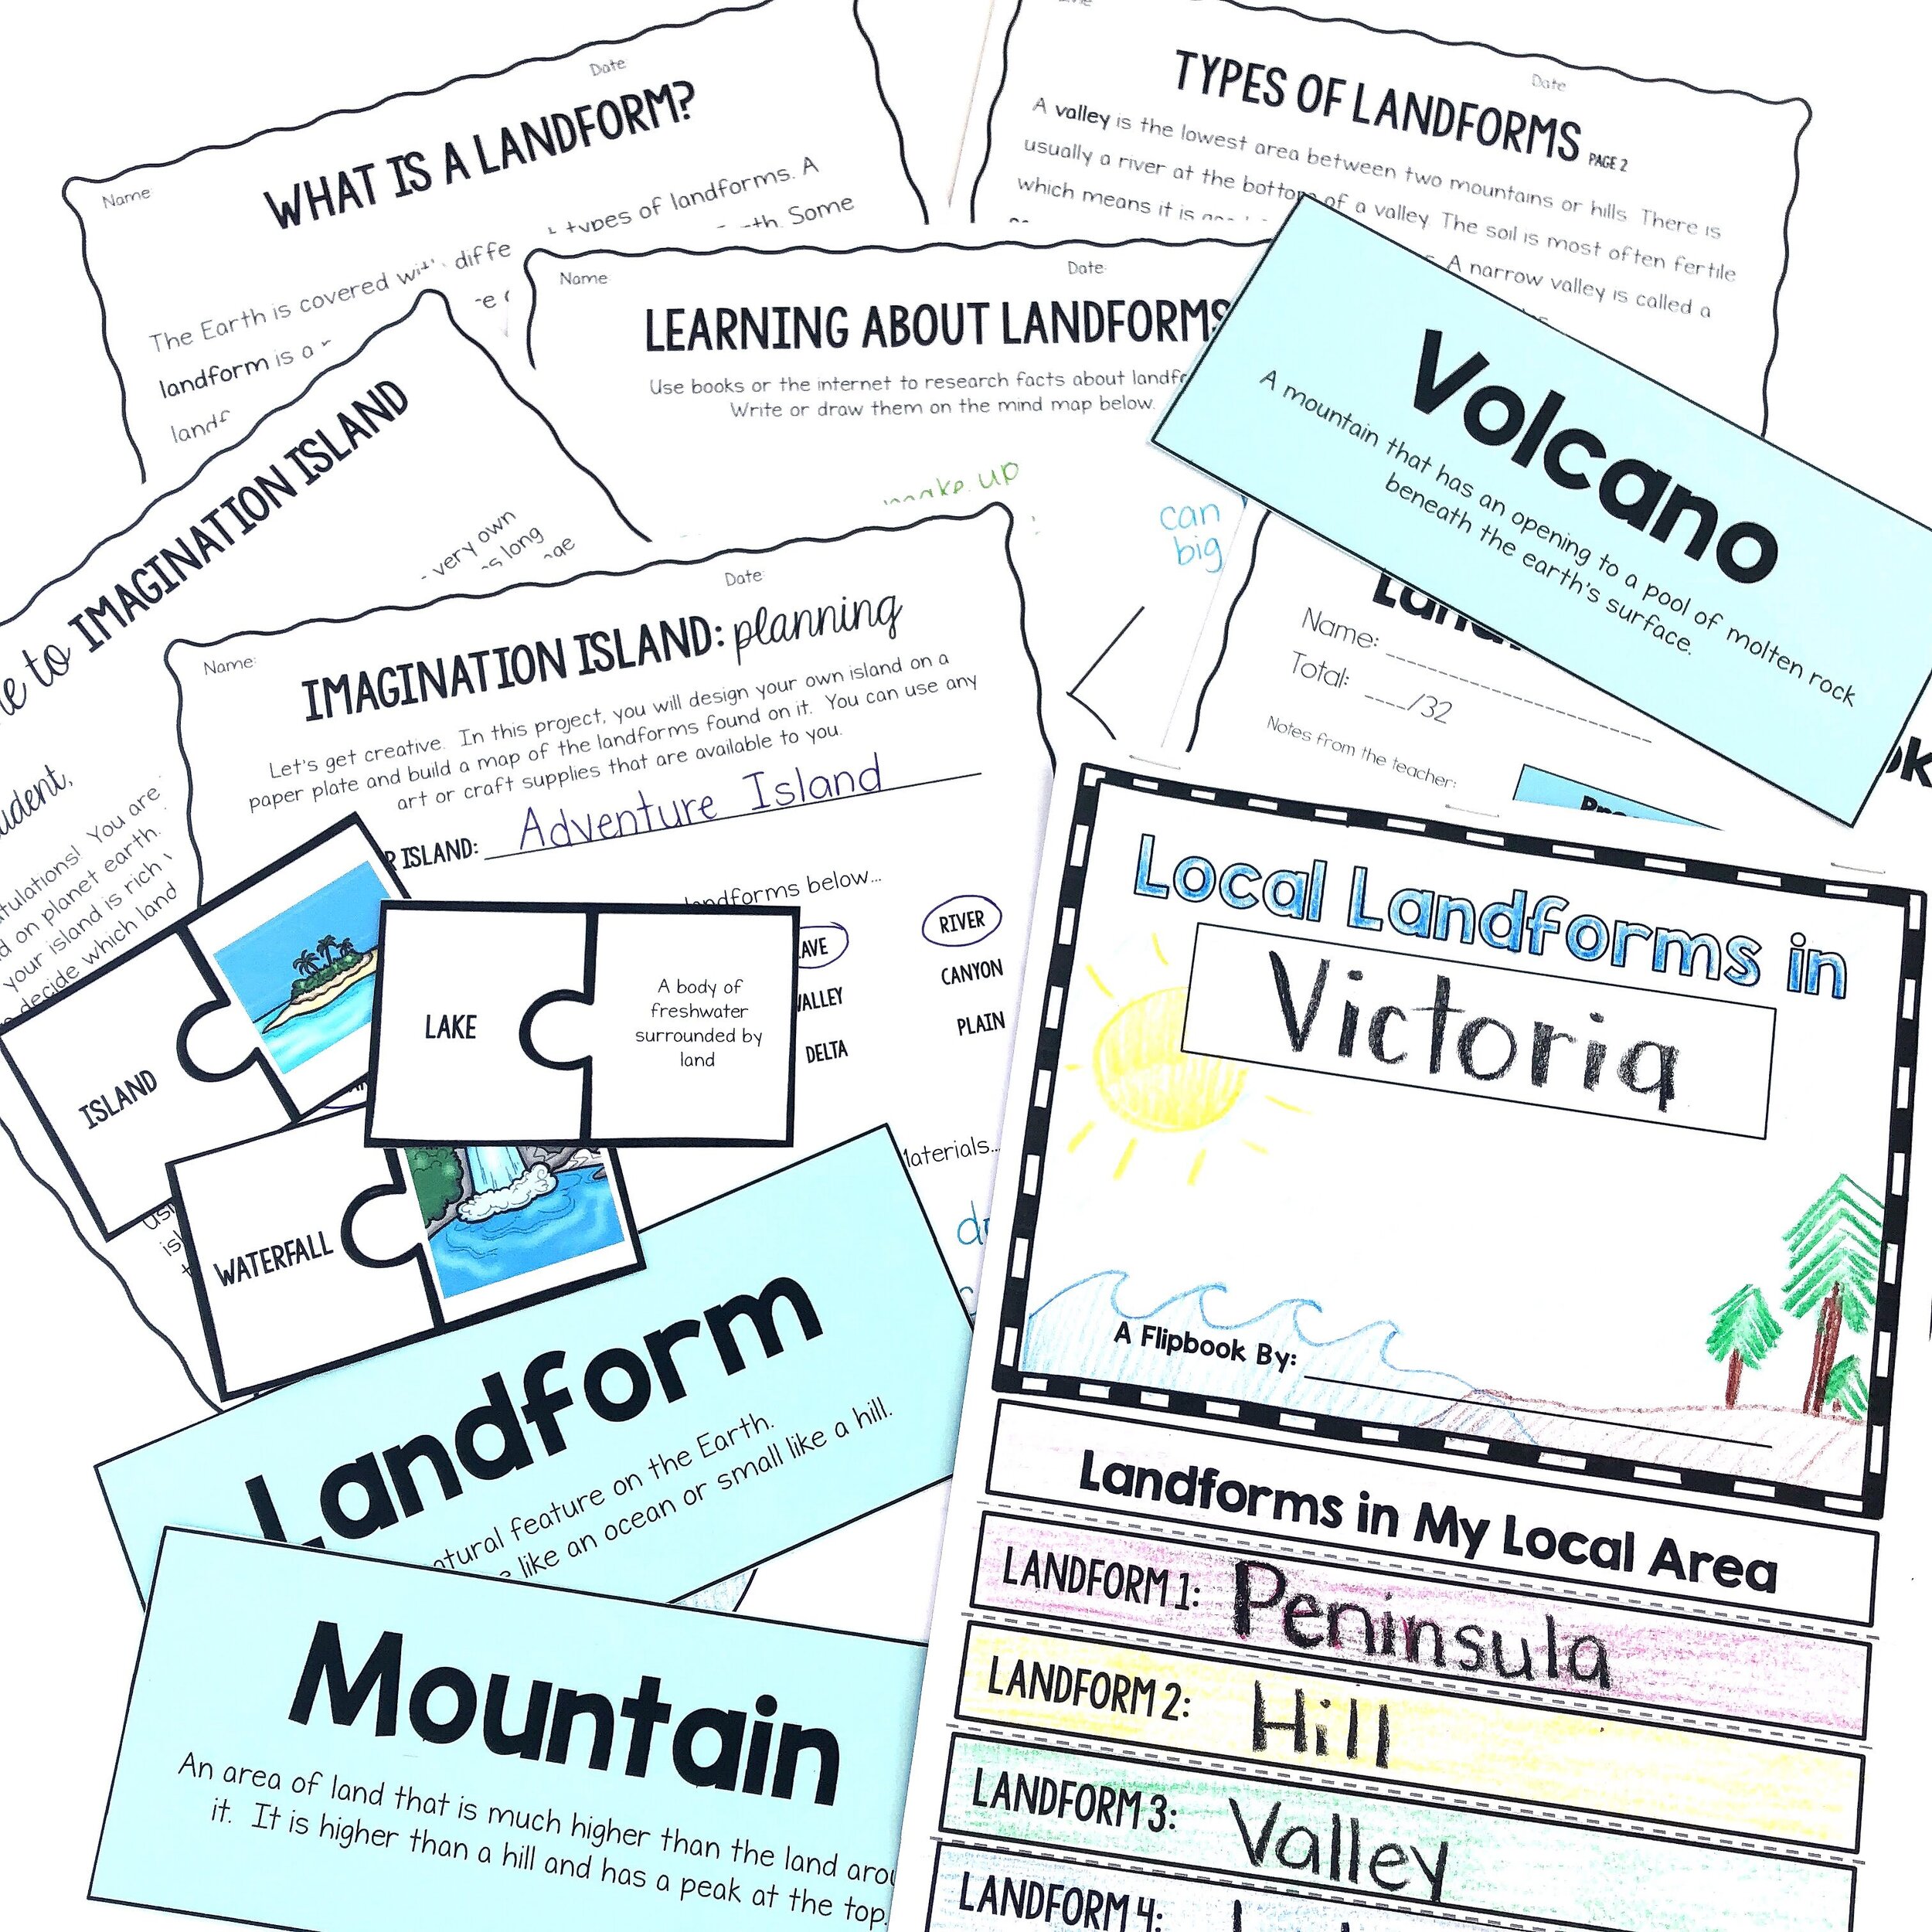
I know… I know… I’m starting to sound repetitive on this one,  but my ‘secret sauce’ to successful science is to pre-teach new vocabulary before we really dive in to a new unit.  That means starting with a few lessons on landform vocabulary.  I’ll set up vocabulary words around the classroom and we will do a ‘vocabulary hunt’ where students can search for definitions.  We might also set up a vocabulary ‘memory game’ where the vocabulary words and definitions are placed face down on the carpet and are flipped face up one at a time, just like the traditional ‘memory’ card game. These activities help new words to become familiar enough before we really dig into our science lessons. 

Get Outside and Get Observing

You will be able to find at least one landform example on your school grounds… so find it, sketch it, and label it!  Our school was ON an island, with a view of a mountain… two landforms in one! 

Nothing to observe? The outdoors is the perfect place to create a sketch of what a landform might look like on blank paper.  Sketch an island!  Draw a picture of a the place where a river meets a lake (this is called a delta).  If possible, I like to teach most of this unit from outside of the classroom.  

Explore Local Landforms In Depth

Our ‘Local Landforms’ flipbook project.

Our ‘Local Landforms’ flipbook project.

More local landforms? Shocking!  But I really do believe in making local connections to the curriculum wherever possible. We ended our landforms unit with a flipbook project that asked students to think about all of the local versions of as many landforms as we could think of.  A local lake, a local waterfall, a local valley, a local desert, a local cave, a local ocean, etc.  It was neat to watch them make connections to places they had all been or heard about. We also used our classroom devices to research places to help fill gaps for students who hadn’t had firsthand experience with each place and to add facts and details about each location. I, personally, had never been to a local waterfall, so this research component was helpful for me as well!

Teaching-Landforms-Button

Let me plan your landforms unit!

Looking for a whole unit?  The complete landforms science unit features nonfiction reading passages, vocabulary, teacher-led lessons, FUN activities, project-based learning, and detailed lesson plans all along the way.  Let me take this off your plate!

Pin me to save these ideas for later!

Local-Landforms (3).jpg
How is Thermal Energy Transferred? Science for Kids

Teaching about how thermal energy is transferred in elementary science is so much fun because it’s a great unit to get totally hands-on. We build, we try, we experiment, and we really explore the different ways that heat is transferred. Here are some of my best ideas, experiments, tips, and tricks for teaching about thermal energy specifically for kids!

thermal-energy-science-lessons.JPG

When do you teach thermal energy in the classroom? 

I really don’t think it matters when you are teaching thermal energy, each season has its own benefits when you’re teaching about how heat is transferred.  I’ve always taught it during the winter when we can dive in to the concepts of conductors and insulators (because brrrrr, it’s cold outside). This way, we can warm up with a conducting mug of hot cocoa.

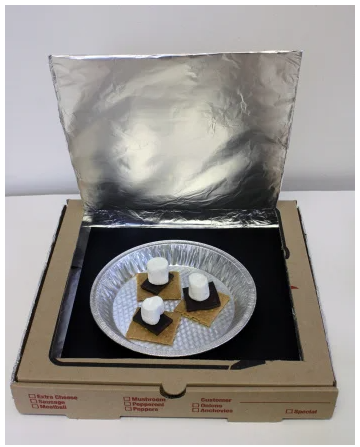
However, the spring/summer also works, because feeling the warmth of the sun allows kids to make great connections about how the sun is radiating heat.  Plus, a warm sun helps some fun projects, like this solar oven, really work!

The only timeline I follow is that I make sure I’ve covered ‘matter’ first in my curriculum. So many of our discussions about thermal energy and heat transfer refer to ‘particles’ and I want the kids in my science classroom to have a good understanding of matter, and how particles move in different states of matter.  I don’t want them to be confused when I mention that “the atoms bump into each other”, because we’ve already covered ‘what is an atom’ in previous lessons!

Where do you start with thermal energy?

I start every single science unit with a handful of teacher-led lessons.  Before we head into the experiments, inquiry, and student-led learning portions I always spend a class or two teaching vocabulary and new concepts.  I find that front-loading this knowledge gives students the confidence to explore and ask questions later on. 

In this time, we usually do some non-fiction reading about our new science topic (either reading passages at my students’ level, or books from the library) and then head to vocabulary practice.  I’ll set up a Science Word Wall with our new vocabulary and we’ll play some hands-on games until students are familiar with the vocab for our unit.  In thermal energy, I want them to be comfortable with words like convection, conduction, radiation, energy, conductor, insulator, and atom before we even begin.  

Get hands-on with experiments

Learn about the ways thermal energy is transferred in as many hands-on ways as possible. While teacher-led learning is fine, hands-on experiences is what will make the learning ‘stick’.  So when I’m teaching thermal energy I try my best to have as many hands-on science activities as possible.  

To teach conduction, we’ll have tea (or hot cocoa!) together.  If you are allowed to share beverages with your students, this is a great chance to make science class extra special!  Pour each student a warm mug of tea and allow them to hold the warm, but not too hot, mug in their hands.  They will feel the heat transfer rom the mug into their cool hands. This is conduction! 

To teach radiation I like to get outside on a warm and sunny day to feel the sun radiate and warm up our bodies.  Too cold for this?  Try gathering around a space heater!  (The heat from a candle is also radiation... but feel the heat from this one with caution around little hands!) 

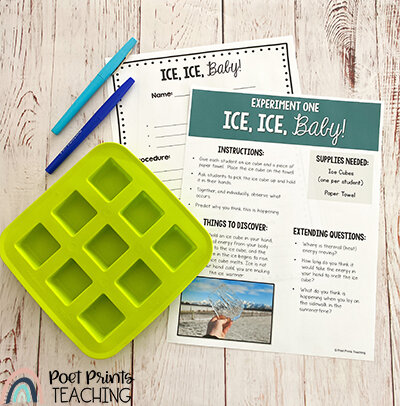
I love experiments that need very few supplies.  In my first few years of teaching, I had access to very few additional materials at my school. My budget was unbelievably small (teacher life!) So my desire is always to find activities that can be done in classrooms for almost no money.  Ice Ice Baby is one of my favorites.  If you can freeze a class set of ice cubes, you are set! This experiment asks students to MELT an ice cube in their bare hands to experience heat transfer from their warm palms into the frozen ice cube. The full set of instructions for this fun and simple experiment can be found in my Thermal Energy Science Unit.

Have a bit more time and a few more supplies?  These instructions guide you through how to use heat energy to make s’mores in a classroom solar oven!

thermal-energy-digital-version.jpg

Let us plan your thermal energy unit!

Looking for a whole unit? The complete thermal energy science unit features nonfiction reading passages, vocabulary, teacher-led lessons, 3 hands-on experiments, a quiz, and detailed lesson plans all along the way.  No planning needed, just print and that’s it!


Biodiversity Science Lessons

There's something about being outdoors that is good for the soul. Thankfully, I live on the west coast of Canada so there are easily a half-dozen beaches within a ten-minute drive from my house, and they are stunning. Every time I go, there is something new to explore and discover. Biodiversity is a key part of our grade 3 science curriculum here in British Columbia and, between you and me, it's one of my favorite units to teach. There is just so much to unpack and the science lessons lend themselves so beautifully to student-centered learning. Take a peek at my ideas, activities, and tips for teaching biodiversity (the diversity of life) in elementary science.

Biodiversity: Lesson ideas, projects and freebies that teach all about our great big world. Image: a globe is pictured falling into a pool of water.

Biodiversity: Lesson ideas, projects and freebies that teach all about our great big world.
Image: a globe is pictured falling into a pool of water.

keep the biodiversity local

We always study our local biodiversity. While teaching about biodiversity in Africa may seem exciting, (yay for lions and tigers and zebras!) there is so much biodiversity in our own backyard. Teaching about the local diversity of life helps to give my students an appreciation for the plant and animal life that exists right where we are!

get outside

I like to teach our biodiversity science lessons when the weather is most likely to be nice (although, on the wet west coast, nothing is guaranteed), so that we can head outside to try and observe biodiversity in our own schoolyard.  

A number of times throughout the unit we will take a walk on our school grounds or in the neighborhoods surrounding our school. If your school policies allow this, a neighborhood walk is a free and fun field trip! We will head out with cameras or sketchbooks to make notes of the many different plants and animals that we observe on our way.  My students are often so surprised at the wide variety of bugs/insects/plants/birds that they can find in just a short 20-30 minute walk.

If you are able to bring a couple of smartphones (I had parent or high school volunteers come for this), the app Picture Ths is great for identifying local plants. If this isn’t possible, the app also works from a picture! Students can snap photos of local plants near their homes, and you can identify them using the app at school from submitted photos.

follow student passions

Towards the end of our study of biodiversity, we move to student-led learning. After students are familiar with ecosystems, food chains, living and non-living things, and the components of our local ecosystem, it’s time for a little project-based learning.  I let each student pick which part of our study of biodiversity interests them and RUN with it.  I once had a student do a project on a species of local moss... not my first pick but it made him very excited to research!

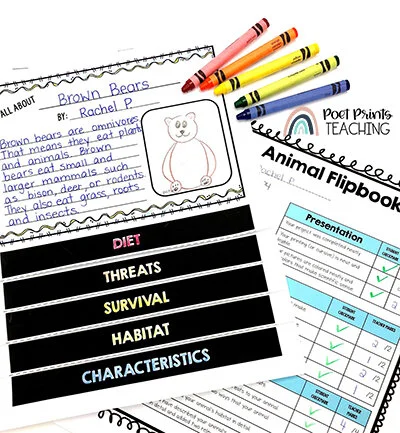
Students zero in on one specific plant or animal and do more in-depth research.  They place their subject into an ecosystem, learn about its place in the food chain, discover its diet, and explore any predator and prey relationships that it is a part of. The student becomes THE classroom expert on this plant or animal.

Image: An animal flipbook project on brown bears is displayed on a table.  A flipbook rubric is behind the brown bear project.

Image: An animal flipbook project on brown bears is displayed on a table. A flipbook rubric is behind the brown bear project.

We use my digital and printable animal research templates to complete these projects.  It ends up being so fun to watch students dive deep into something they care about.  At the end of the unit, we work together to come up with a way to share their learning.  Some years we do formal presentations.  Other years, we set up a ‘gallery walk’ where other classrooms can learn a bit about each animal.  My personal favorite was the year we filmed each student presenting their animal like they were the host of a Discovery show, and compiled all of the presentations into a class movie! 

Biodiversity (1).jpg

Let us plan your biodiversity unit!

Looking for a whole unit? This complete biodiversity science unit features nonfiction reading passages, vocabulary, teacher-led lessons, project-based learning, a guided inquiry project, small group projects, and detailed teacher instructions all along the way.  No planning needed, just print and that’s it!

“This fits in great with the BC Grade 3 Science curriculum. My 3s are enjoying the activities and I like that there are reading passages with questions for them to answer. So far we are half way through the unit and everyone is excited when it is time for Science! Thanks!” - Denise M. (A real-life teacher using the Biodiversity Science Unit in her classroom!)

Force and Motion Activities For Kids

Teaching about force and motion is one of the most fun parts of our science curriculum! The whole topic naturally lends itself to so many hands-on experiments and challenges that it’s easy to keep kids in second and third grade engaged and having fun. These Science lessons are easily some of my favorite ones we do all year.

force-and-motion-activities.JPG

When we cover force and motion in elementary (second, third, and fourth grades) we do a little bit of everything: push forces, pull forces, friction, static electricity, magnetic force, air resistance, and more!

The Easy Way to Teach About Force and Motion

Everything you need to teach about forces and motion in 2nd and 3rd grades. Nonfiction reading, STEM Challenges, Experiments, Worksheets and scripted instructions.

Print and teach. It’s really that easy.

Start With Force and Motion Vocabulary

Although I am a big believer in student-led learning, I always start my units with teacher-led information. When I scaffold learning this way (by front-loading the teaching) I'm giving my students a solid foundation for the hands-on experiences that are coming later on. For force and motion, we start with learning all of the basic vocabulary. I'll set up a word wall, and we'll use simple non-fiction readers to help to teach unfamiliar concepts. These force and motion worksheets serve an important purpose in our classroom!

Then, when we start getting into group and student-led lessons, my students are being tripped up when they encounter words like "static electricity" or "magnetic force" or "friction" because they have a basic understanding of most of these already.

Helpful Force and Motion Videos

In the past, I've used videos and youtube clips to help students really understand these physics concepts. If you can access YouTube at school, these were great videos to help introduce new vocabulary with visual aids!

This first video introduces the difference between pull forces and push forces.

This video is all about Friction! We used it before our Friction stations to give students a little more background knowledge before some hands-on exploration. (Plus, the host is really engaging!)

Force and Motion STEM Challenges

The Force and Motion unit includes 3 hands-on stem challenges!

I have always been a big fan of STEM challenges. If you haven't done one before (*insert mind-blown emoji) , this is a GREAT place to start. The open-ended nature of these challenges let students be successful as they guess/test scientific theories at an age-appropriate level.

In our force and motion unit, we do a handful of STEM challenges and the Magnet Maze is probably one of my favorites. It's so creative and my students had the best time gathering materials and creating their magnet mazes. When they're complete, we take the time to test each other's mazes. It's a blast. You can grab the worksheets and teacher lesson plans for this STEM challenge below!

Nonfiction Reading About Forces and Motion

One of the best ways to give students scientific background knowledge is nonfiction reading. I firmly believe in integrating science and reading, it’s a great way to set students up for success. When students can access nonfiction about each science topic (at their level) it can level up the engagement.

Force and Motion reading passages and STEM extension

This is a set of paired passages all about force and motion, and using forces in real life. They’re written to be at a third grade level and are also aligned to the CCSS - so you’re meeting two sets of standards at once! This particular resource also includes a STEM challenge that’s all about catapults - the ultimate force and motion tool


‘Balanced and Unbalanced Forces’ a set of differentiated nonfiction passages

If you JUST need nonfiction reading, I have a set of differentiated passages all about balanced and unbalanced forces. It’s a good place to set the stage and teach students the differences between the two!

Ready to teach the entire Force and Motion unit? I have an entire unit’s worth of lessons, hands-on activities, and experiments that are ready to go! Everything you need to teach all about forces in second and third grade is here and ready. Just print, read, and teach.

Ideas, lessons, and experiments to teach about force and motion in a second or third grade classroom.

Ideas, lessons, and experiments to teach about force and motion in a second or third grade classroom.

Writing Stories in Third Grade

Teaching students to write great narrative stories can be a daunting task. Characters?  Setting?  Plot?  Problem?  Solution?  Do it all at the same time?!  How can we, as teachers, make sure that students are understanding the complexities of narrative writing, using their new skills effectively, and having fun? As I have taught story writing to class after class of third grade students, I have found a few things to be most valuable year after year.  Take a peek at my 6 must-do strategies for writing stories in third grade!

Teaching Students to Write Stories Tip #1: Find good anchor books

Anchor books are key to kicking off a new unit and helping key concepts to really 'stick'.  This year, I have a class of kids who will do almost anything for "just one more story" and who am I to say no?

Ralph Tells a Story by Abby Hanlon

This is one of my all time favourite Writing anchor books, especially for encouraging struggling writers.  In this story we follow the main character as he learns that anything can be the inspiration for a good story.  Great ideas for writing are all around us!

Chester's Masterpiece by Melanie Watt

This book is a great story during the 'editing' stage of writing.  Chester, a precocious cat, playfully argues with the narrator about the best ways to write his own story.  It's a great way to introduce the need for students to edit and revise their work in order to produce quality writing.

Teaching Students to Write Stories Tip #2: Choose a theme for your stories

At times, broad writing topics such as "write a story about whatever you want"  can be overwhelming for third grade students.  After a miserable failure with this my first year in third grade, I began narrowing down the options and giving each class a theme.  This helps to guide our mini-lessons and allows me to teach specific skills related to a particular genre of a narrative story.  Here are a few of the themes that we have enjoyed:

  • Animal Stories

  • Who-done-it Stories

  • Time-Travel Stories (inspired by 'The Magic Treehouse')

  • Space Stories

  • Under-the-Sea stories

Teaching Students to Write Stories Tip #3: Model writing as a group

Throughout the story writing unit, I always take time to model the story-writing process through a collaborative class book.   We take an idea and explore it all the way from idea to rough draft, and finally correct it and write a good copy as a group. I like to use chart paper so students can see me physically writing out the story in real-time, and modeling how to craft each aspect of the narrative story.  We add a little more to our story each day!  Through practicing whole-group writing, students are are able to carry out each skill with greater confidence when they begin to write independently.

Teaching Students to Write Stories Tip #4: Teach an important skill each day

As students write their whole-class story, they are also introduced to a new writing skill daily.  It is during this short lesson that they are introduced to vital story writing techniques such as:

  • How to brainstorm ideas before you begin

  • Planning to have a beginning, middle, and end

  • Turning a plan into a creative story

  • Creating an engaging topic sentence

  • Using dialogue

  • Using punctuation

  • Crafting complex and compound sentences

  • Ending stories in a satisfying way

Pictured above: Detailed story planning pages, used to teach pre-writing skills via graphic organizers.

Plan Your Narrative Writing With One Click

Looking for a FAST way to plan out your Narrative Writing unit that includes all of the graphic organizers to create AMAZING stories? In just a few clicks you can grab all of the pieces you need: teaching instructions, planning pages, rough and good copy space, AND a rubric. Click and print. Planning is really that easy.

Teaching Students to Write Stories Tip #5: Conference one-on-one

Once students have begun their independent writing time (immediately following the mini-lesson, and modeled whole-group write) I pull 3-4 students for one-on-one conferences.  Here I am quickly able to give personalized help. For my struggling students, we can work on adding capital letters and punctuation to their sentences.  For my advanced writers, we may be working towards developing a more complex plotline.  This one-on-one time is vital for developing differentiated instruction.

I help my students to self edit each page of their work as well as to do a final edit with a peer (if they are ready) or with me if they need more one-on-one assistance.

After students have completed a quick checklist on each written page, they do a larger edit using this page.  (Available in my story writing unit)

Teaching Students to Write Stories Tip #6: Share, Share, Share

Inspire students to keep on writing by allowing them to share their work out loud, even in the incomplete stages!  As often as I am able, I love to allow students to stand up (at their desks, or on the carpet) and share out loud their favorite 4-5 sentences from their current piece of writing.  It helps them to build confidence as authors.

As you continue I continue in this process I may also allow the rest of the class to offer up "Two Stars and a Wish".  The "stars" are things that they love about the piece of work, and the "wish" is something that they wish the piece would have.

We also love binding our work into final books to send home to our families. It gives students a sense of pride when their stories feel valued by their teacher.  I love creating class books featuring all 24 of my little authors!

Check out my Story Writing Unit on Teachers Pay Teachers to create easy all-in-one booklets for your students.  All of the pages and templates seen in this post can be found in that unit (along with many more!)

Do you have any tried-and-true tips for teaching story writing?  I'd love to hear them in the comments below.  Happy Writing!

Writing Stories in 3rd Grade